Ansible and ServiceNow Part 1, Opening and Closing Tickets
Ansible and ServiceNow Part 1, Opening and Closing Tickets
As a Network Engineer, I hated filling out tickets. Anytime a router would reboot or a power outage took place at a remote site, the resulting ticket generation took up about 50% of my day. If there had been a way to automate ticket creation, I would have saved a lot of time. The only thing unique to provide would have been case-specific comment sections needing additional information about the issue.
While ticket creation was a vital activity, automating this was not an option at the time. This is surprising because my management was always asking me to include more information in my tickets. Tickets were often reviewed months later and sometimes never got created or did not have much relevant information included.
Fast forward to today, companies are now data mining from tickets with a standard set of facts that are pulled directly from the device during ticket creation, such as network platform, software version, uptime, etc. Network operations (NetOps) teams now use massive amounts of ticket data to make budget decisions.
For example, if there were 400 network outages due to power issues, NetOps could then make a case to spend \$40,000 on battery backups, having proved that it would prevent around 400 outages a year. Having access to these metrics is extremely valuable for making informed business decisions.
This first blog in the series covers how Ansible automates change requests from ServiceNow, a popular cloud-based SaaS provider. For convenience, ServiceNow provides developers a test instance to use Ansible Playbooks, which is utilized for this and future blog posts. You can sign up for your own free developers instance at the ServiceNow Developer portal.
Creating a ServiceNow ticket
The Ansible distribution includes the
snow_record
module that makes it easy to open and close ServiceNow tickets. The
pysnow Python library
will first need to be installed to use this module.
The next requirement is getting the
username, password and instance for
authentication to your recently created developer cloud based ServiceNow
instance.
NOTE: the instance should look something like this instance: dev99999 not the full URL
instance:_http://dev99999.service-now.com as shown below in change_request_vars.yml:
---
#snow_record variables

sn_username: admin
sn_password: my_password
sn_instance: dev99999

#data variables

sn_severity: 2
sn_priority: 2
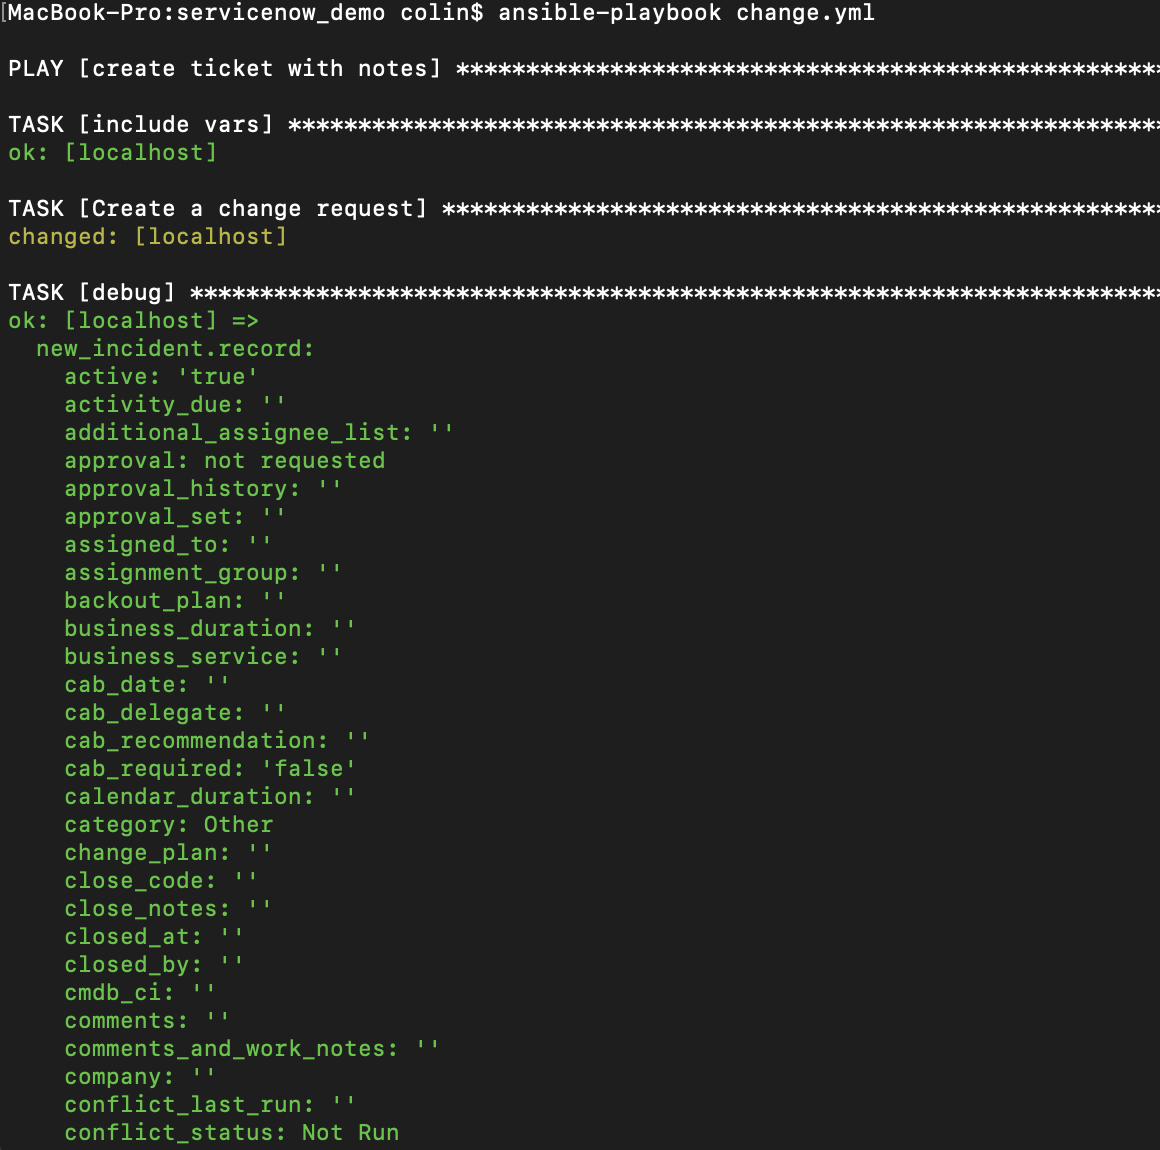
The following is the Ansible Playbook to create a ServiceNow ticket:
---
- name: Create ticket with notes
  hosts: localhost
  gather_facts: no
  connection: local

  tasks:
  - name: include vars
    include_vars: change_request_vars.yml

  - name: Create a change request
    snow_record:
      state: present
      table: change_request
      username: "{{ sn_username }}"
      password: "{{ sn_password }}"
      instance: "{{ sn_instance }}"
      data:
        severity: "{{ sn_severity }}"
        priority: "{{ sn_priority }}"
        short_description: "This is a test opened by Ansible"
    register: new_incident

  - debug:
      var: new_incident.record
Leveraging the ServiceNow API
The table parameter
determines what type of ticket will be opened. A great way to determine
the other parameters available is to view the JSON dictionary the
ServiceNow API sends back after you have created your ticket. I am using
register to give a
variable name to that dictionary and then using debug to view it in the
terminal. The following is just a portion of the full dictionary for the
sake of brevity:
This is very handy in spelling out the parameters you can add under the
data section of your
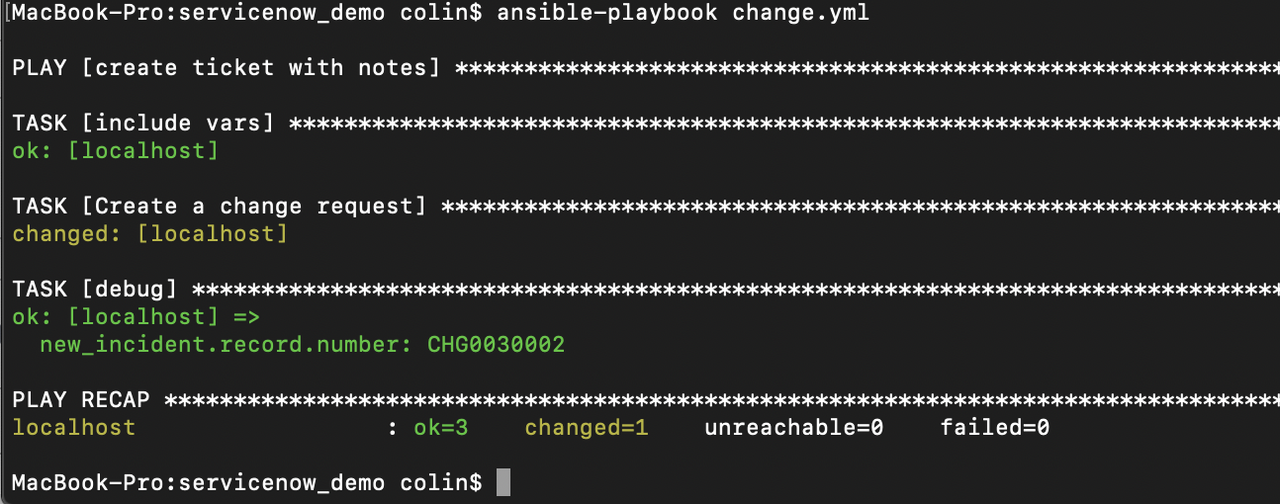
task. If you want to see just one parameter of the dictionary, for
example the ticket number, you can simply modify your debug to look like
the following:
- debug: var=new_incident.record.number
This variable (var) is defined as pulling from the stored register
new_change_request to then show the dictionary named
record and the parameter
of that dictionary called number.
You could do the same thing with any parameter of the record dictionary
such as close_code, state, comments, and many
others.
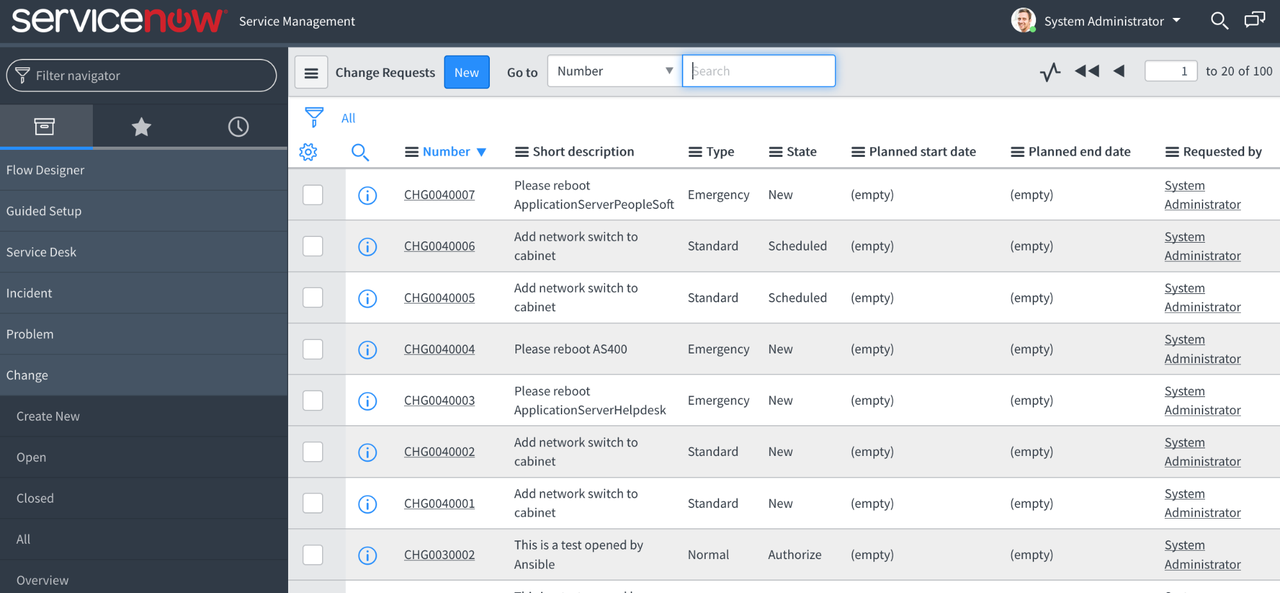
Validating changes in ServiceNow web portal
Next, log into your developers instance of ServiceNow and view the Change->all section in the left menu bar. You should see your change request in the list.
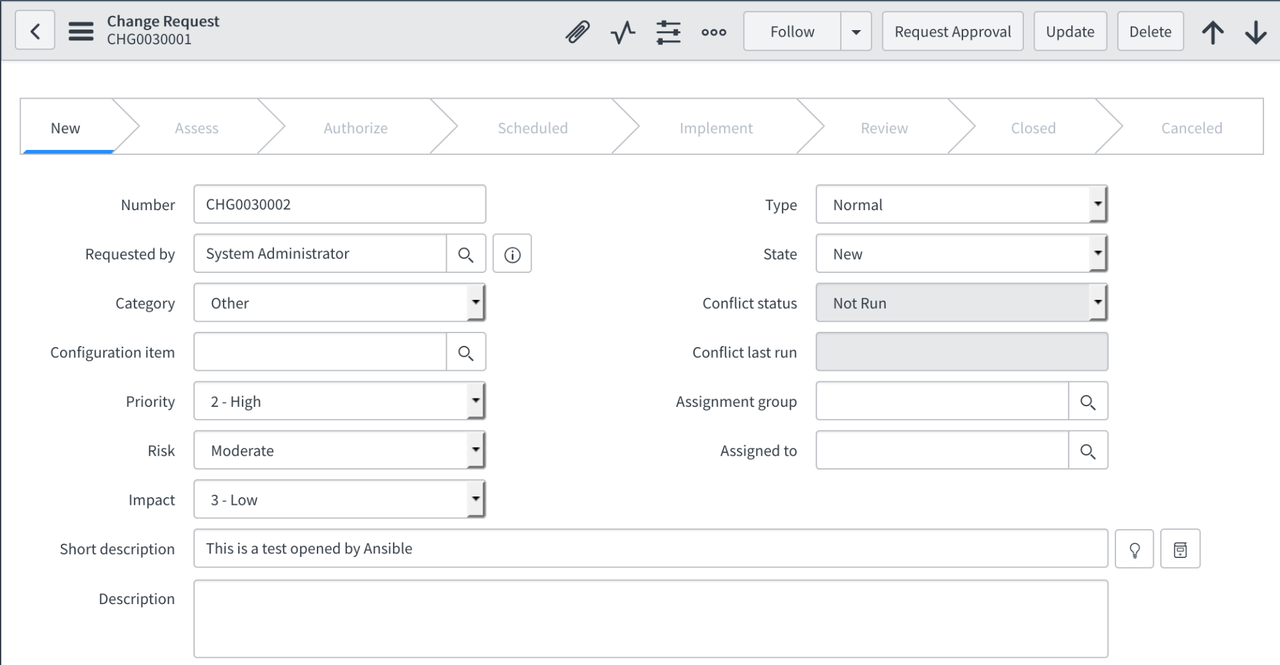
Notice that the short description has been filled out by our Ansible
Playbook task: This is a test opened by Ansible as well as the priority
2 - High.
Closing a ServiceNow ticket
Now that we've demonstrated the opening of ServiceNow tickets, we should
demonstrate closing or resolving the ticket as well. This is done by
specifying the state
parameter in another Ansible task. This is where it can get tricky
because state is a
parameter of the record dictionary as well as a parameter of the
snow_record module.
Please be mindful of this multi-purpose parameter used in Ansible.
The following is a snippet from the
record dictionary when
we created our ticket:

Notice the original state was -5. The Ansible task
below will change it to -3, which results in a
ticket state changing from New to Authorize.
---
  - name: Modify a change request
    snow_record:
      state: present
      table: change_request
      username: "{{ sn_username }}"
      password: "{{ sn_password }}"
      instance: "{{ sn_instance }}"
      number: CHG0030002
      data:
        state: -3
    register: incident

  - debug:
      var: incident.record.state
In ServiceNow a change_request needs to
be walked through a few different states before it can be closed. The
numeric values for the different states can be found in the ServiceNow
documentation. I recommend you have five separate Ansible tasks that
each change the state in this order: -3, -2, -1, 0, 3. Please note that these
values are for the ServiceNow Kingston release and that other releases
may use different state numbers. Your organization may have other steps
required along the way, but hopefully this article was enough to get you
started. At this point you've learned how to open tickets, and close
tickets with specific labels via Ansible Playbooks.
Stay tuned for part 2 - I'll describe adding a set of parsed facts to your tickets.