Deep dive on Ansible VScode extension
Deep dive on Ansible VScode extension
Ansible as part of the Red Hat Ansible Automation Platform continues to
grow and mature. Recent enhancements include Ansible Content Collections,
automation execution environments,
and an increasing list of integrations using plugins and modules. It is
more important than ever that both new and experienced content creators
have access to tools that help them write better content faster. The
newly created Ansible Devtools initiative focuses on developing and
enhancing tools like ansible-navigator, Ansible VScode extension,
ansible-lint and so on to help
ease the Ansible automation content creator experience. In this blog, we
will do a deep dive into the Ansible VSCode extension, giving an
overview of how it works and the initial setup required to get it
working after installation.
Evolution
The Ansible VSCode extension was initially a fork of Tomasz Maciążek's VSCode extension. After the fork, the server and client-side code were decoupled into their own separate repositories to allow independent releases for both server and client.
The Ansible Language Server is released as a node module on the npm repository, allowing it to be reused by other editors supporting language server protocol, while the VSCode extension client was released on the marketplace with many additional features.
Tomasz continues to be a core contributor to the Ansible extension and we would like to thank him and all the other community members for their contributions to help make the extension better for Ansible content creators with every new release.
Introduction to the language server protocol (LSP)
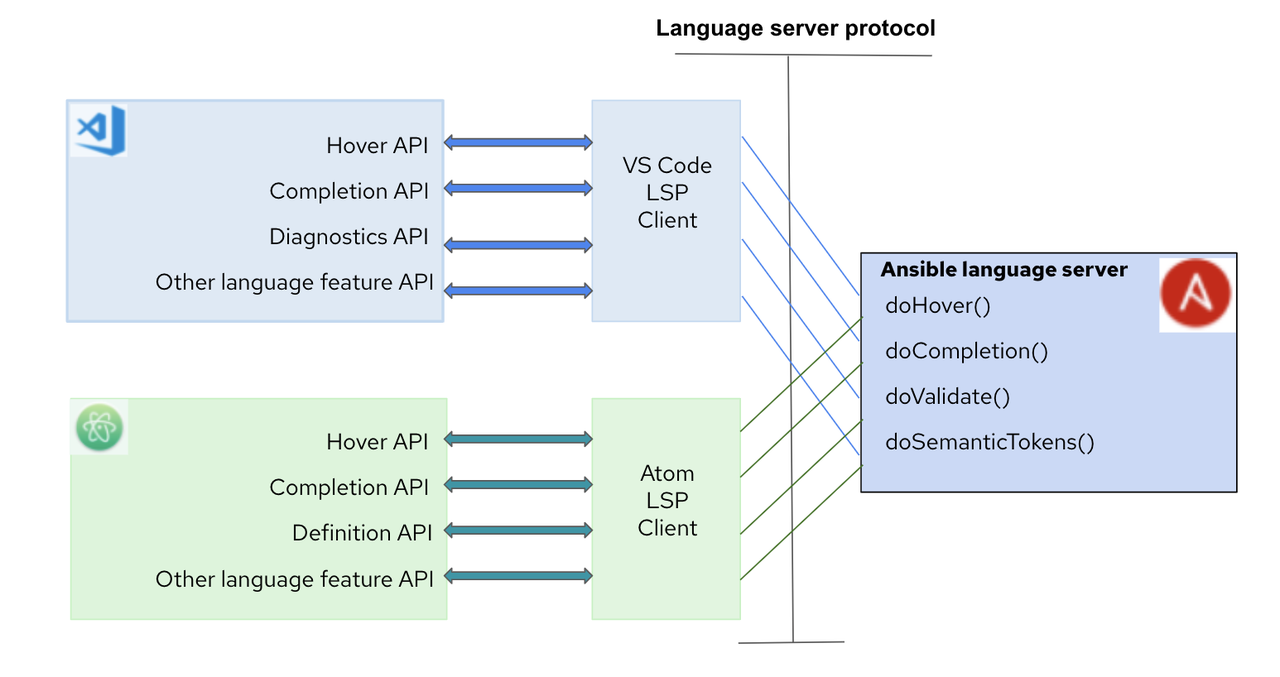
The Ansible Language Server implements language server protocol (LSP), which is an open, JSON-RPC based protocol that is used between source code editors, integrated development environments (IDEs) and servers that provide programming language-specific features. The goal of the protocol is to allow programming language support to be implemented and distributed independently of any given editor or IDE.
Source: https://code.visualstudio.com/api/language-extensions/language-server-extension-guide
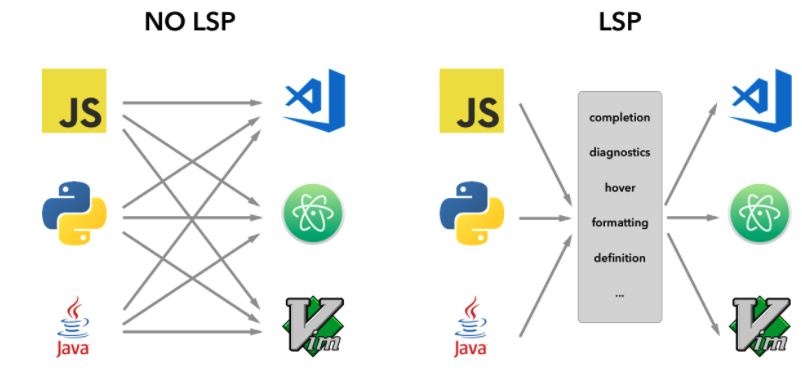
As seen from the above diagram, the language server protocol allows a single language server implementation to be reused by multiple code editors or IDEs, thus avoiding the need to duplicate language-related support for each editor as in the case of no LSP. The language server runs as a separate process and the development tools like VSCode communicate with the server using the language protocol over JSON-RPC. For more details refer to the language server specification.
Ansible Language Server
The Ansible Language Server provides features like:
- Code completion
- Hover (display keyword description on hover)
- Goto definition (for modules)
- Diagnostics and so on
It serves the JSON-RPC request sent by the development tool (client). The language server runs Ansible commands like ansible-config, ansible-playbook and so on to support these features and thus requires an Ansible package or ansible-core installed locally or within an automation execution environment. In addition, the language server relies on ansible-lint for providing diagnostic information if installed and enabled (default). While running with an automation execution environment, ansible-core and optionally ansible-lint should be included.
Extension installation
In the VSCode Extensions tab, search and install the Ansible VS Code Extension.
Note:
- When the extension is installed for the first time, the "Runtime Status" is "Not yet activated" which indicates that the extension is not yet running. The status will be activated only after a file is opened in the editor and the language identified for the file is "Ansible".
- For Windows users, the extension works with WSL2 and not on native Windows.
Ansible extension settings
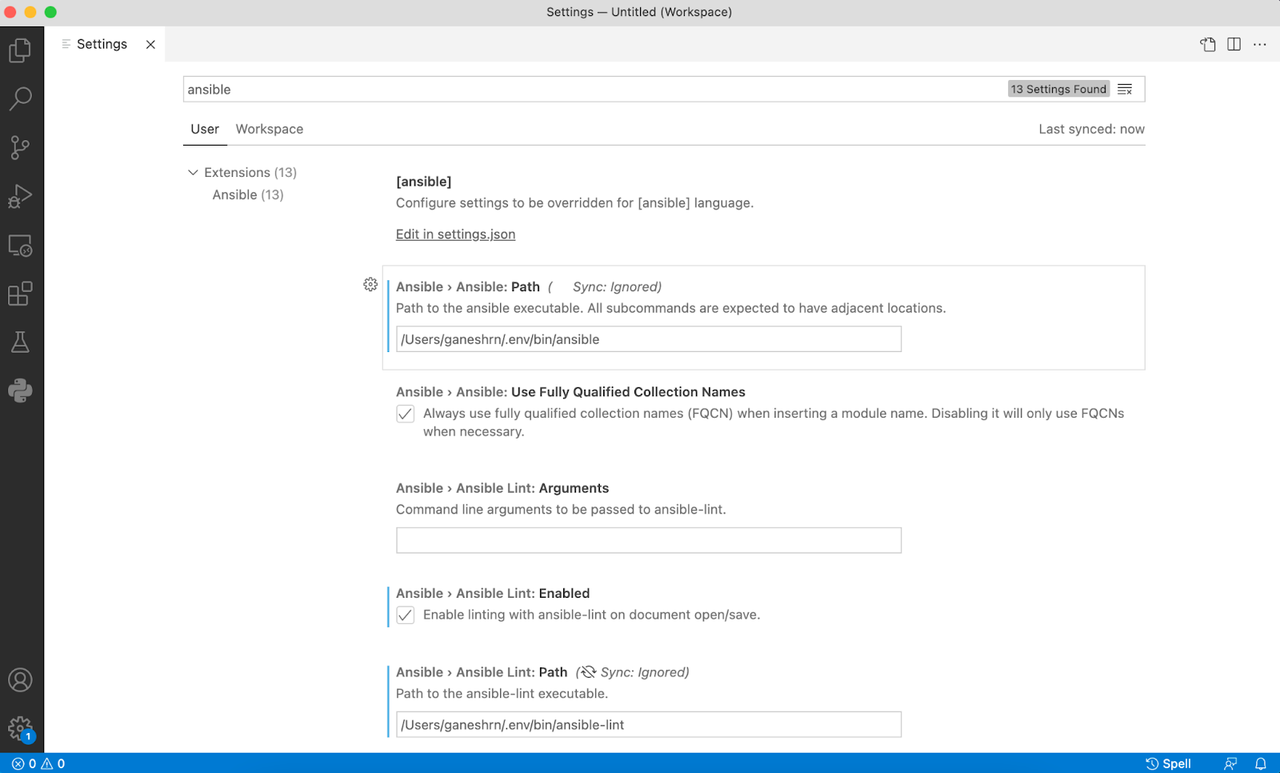
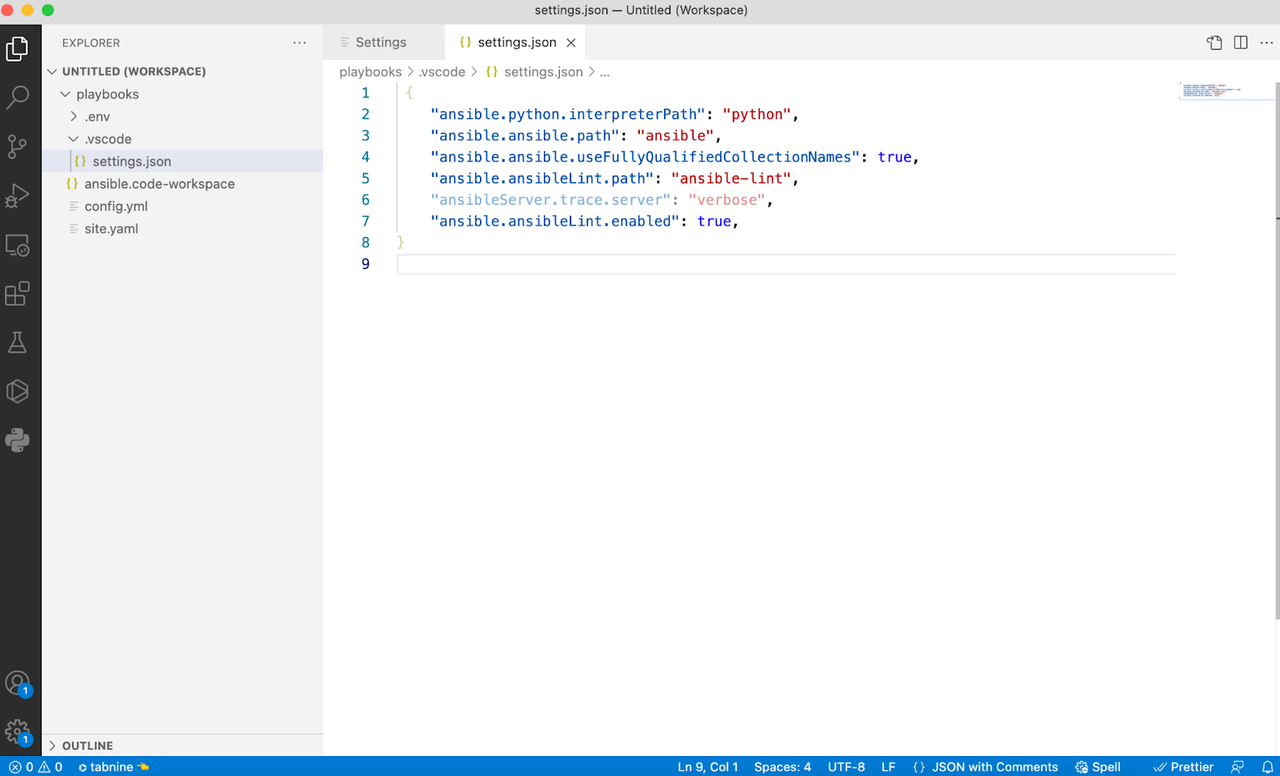
The Ansible extension supports multiple configuration options allowing, for instance, to change the executable path for Ansible, ansible-lint, python interpreter and so on. There is also an option to enable the automation execution environment and users can choose the container engine, image name, pull policy and more. To see and change the configuration options in the VSCode window, go to Code->Preference->Settings and in the Search settings box type "ansible" as shown in the below snapshot.
The preferences can be set for a given user or workspace, and depending on the environment, also for remote type and workspace folder. Settings in the user scope will be applied globally for any instance of VSCode that is opened. Workspace scoped settings will be stored inside your workspace and only apply when the current workspace is opened. For more information refer to the VSCode documentation here. Alternatively, for workspace settings, you can also provide the Ansible settings by editing the .vscode/settings.json file within the workspace root folder as shown below.
Activating and using Ansible extension
As stated above, the vscode-ansible extension depends on the ansible-language-serverrunning as a background process to provide features for Ansible Playbooks and task files like auto-completion, hover, diagnostics, goto and more. The extension also depends on the Red Hat vscode-yaml extension to provide auto-completion and diagnostics information of other related files like Ansible vars file, ansible-navigator settings file, ansible-galaxy requirements and metafiles, ansible-lint configuration file and other YAML files. The extension uses file pattern match to associate the file with the YAML language. For details about the file pattern and associated schema file used by the vscode-yamlextension, read more here.
With this context set, you can now go ahead and open the root of your Ansible project in the VSCode window. That folder will be a root of your workspace, also treated as the current working directory by the Ansible Language Server while executing Ansible commands in the background. If you try to open an Ansible file without first setting up a workspace, the plugin might not be able to determine the context (such as CWD) correctly.
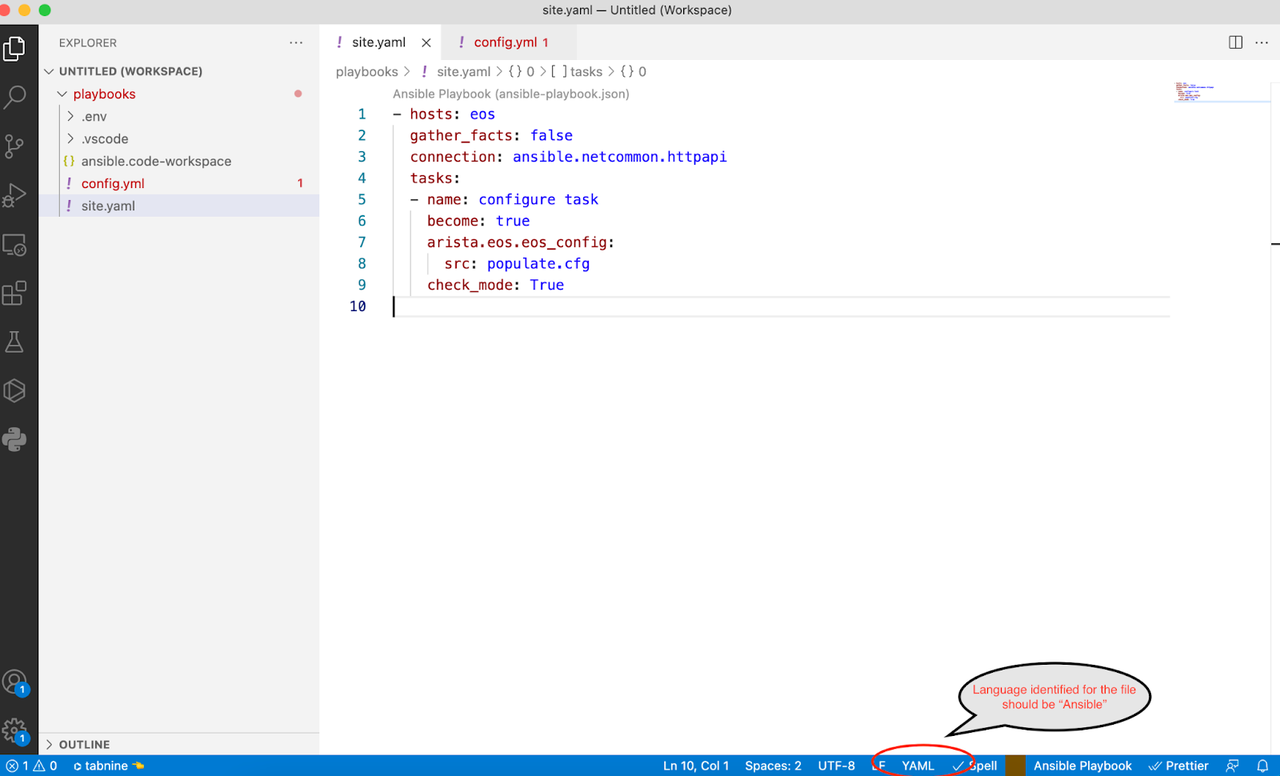
After an Ansible file is opened in the VSCode window, it might not be identified correctly as an Ansible language type as seen in the below snapshot. Most likely, the file will be identified as "YAML" language since Ansible files have either "yaml" or "yml" extension and installing the vscode-ansible extension, in turn, installs the vscode-yamlextension.
Hovering the cursor on the language identified (YAML in this case) in the bottom right corner you will see "Select Language Mode". By clicking on the identified language name (YAML) it will open a drop-down menu; type "Ansible" in the tab and then select it. After doing this, you will notice the identified language for the file is changed to "Ansible" as shown in the below snapshot.
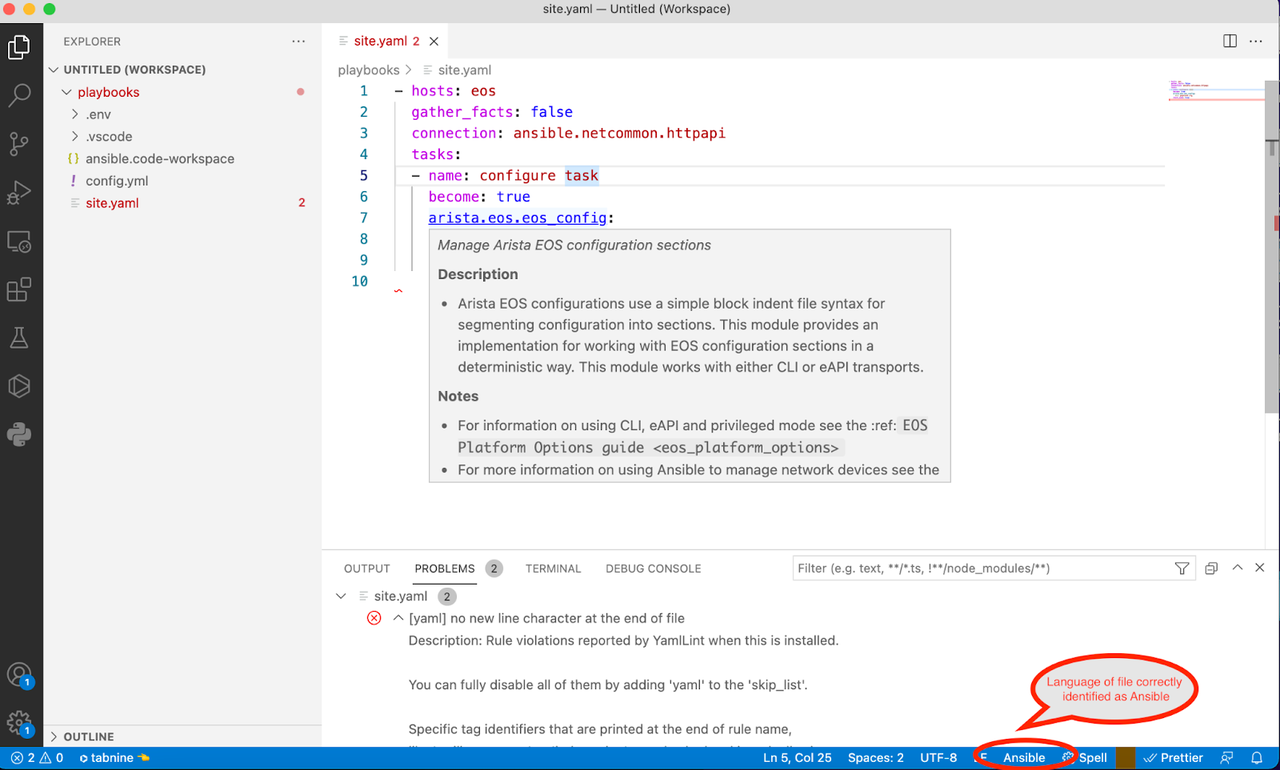
When the file language is identified as Ansible for the first time, the vscode-ansible extension will be activated and the extension will run the ansible-language-server process in the background which provides auto-completion, hover and diagnostics information as you type and/or hover within the file. The diagnostics information will be available in the PROBLEMS tab. If it's installed and enabled, the language server will run ansible-lint by default to generate diagnostics information on the open file. If ansible-lint is not installed, the server will run ansible-playbook --syntax-check to generate diagnostics information.
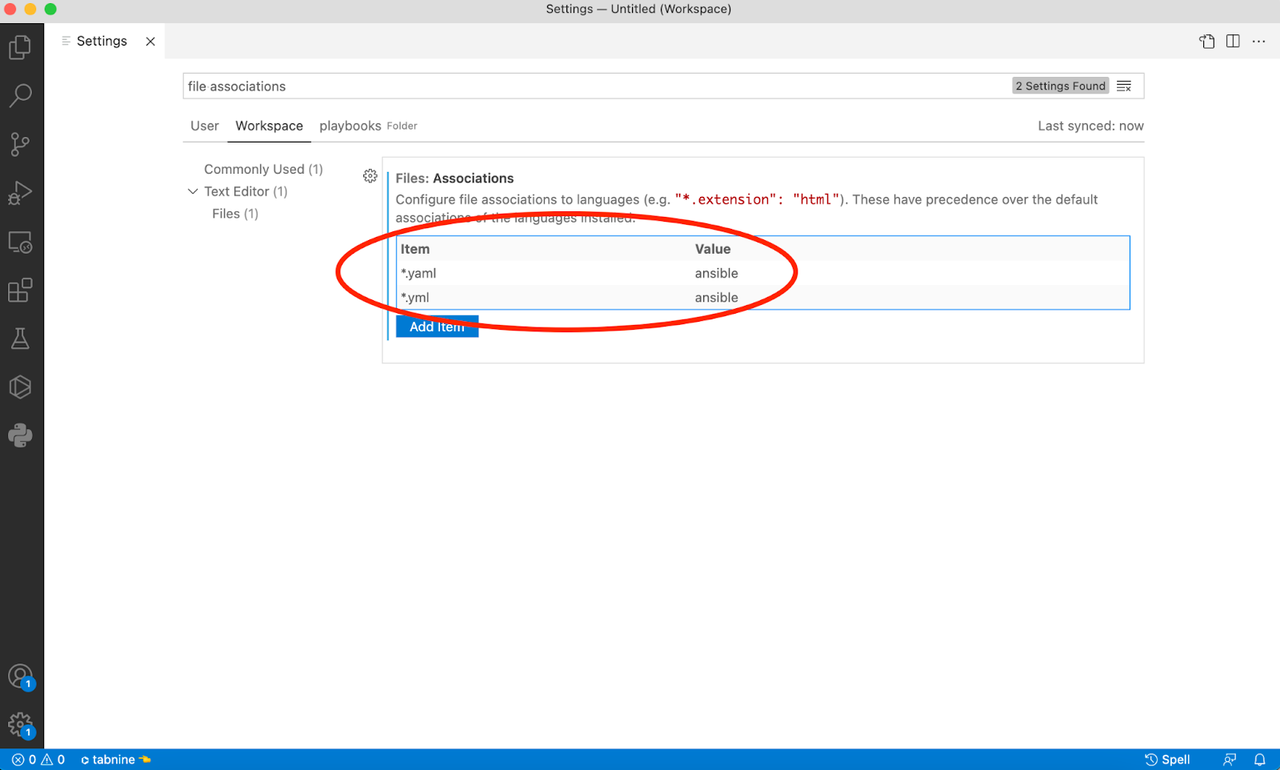
Instead of changing the language for each file, you can set the file associations setting by clicking on "Code -> Preferences -> Settings" and typing "file associations" in the search box. Add an item to associate the extension with the language type as shown in the below snapshot.
For more information on file associations, refer to the document here.
Using automation execution environments
To see the automation execution environments supported by extension, you can go to settings (Code -> Preferences -> Settings) and type "ansible.execution environment".
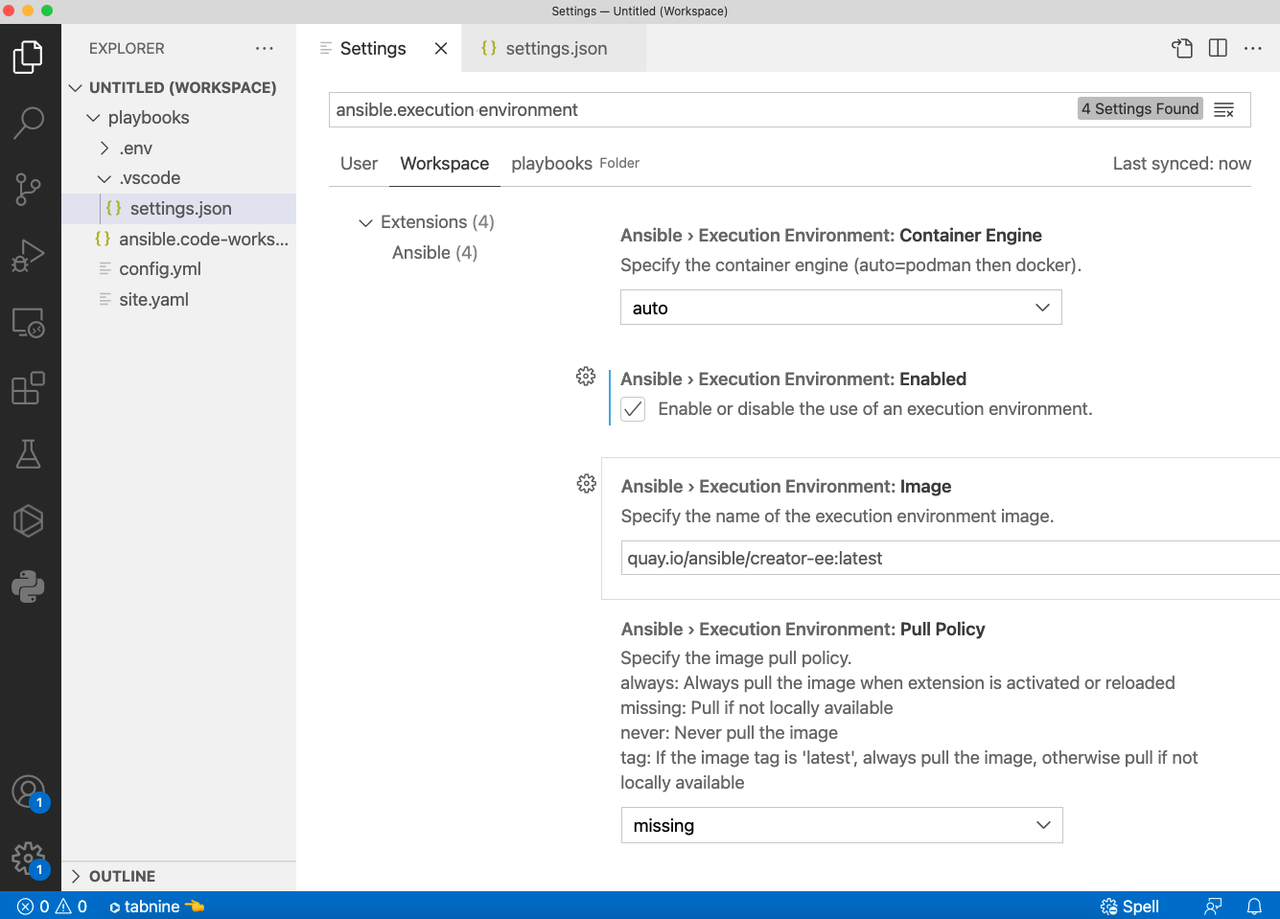
After enabling the execution environment (EE), the extension will pull the "quay.io/ansible/creator-ee:latest" image by default, if it is not present locally. The value of the image can be changed by providing the intended value for "ansible.executionEnvironment.image" setting. After the EE pull is successful, the Ansible extension will copy the plugins docs from within EE to the local cache folder and it will be used to provide auto-completion, hover and goto functionality. Since the "creator-ee" image has "ansible-lint" bundled, the Ansible extension and ansible-language-server will volume mount the entire workspace within the EE and run "ansible-lint" or "ansible-playbook ---syntax-check" based on settings to provide diagnostics information in editor.
Note:
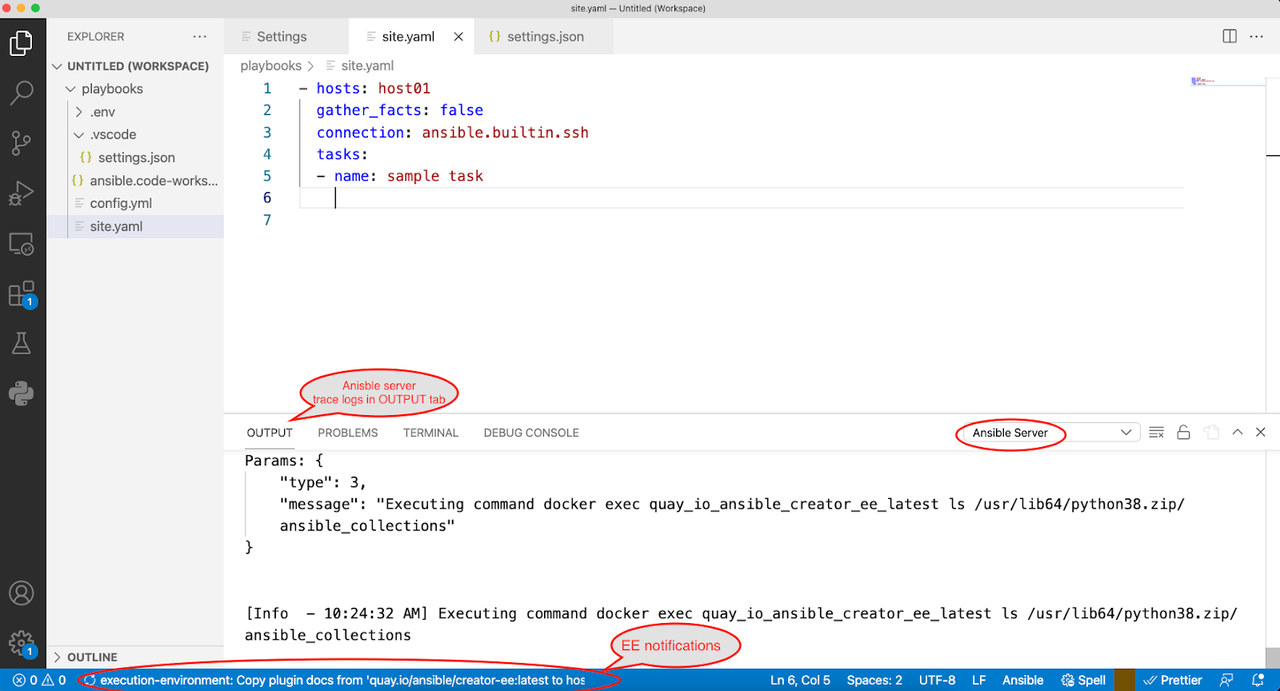
- If auto-completion and other features are not working after enabling the execution environment, you can reload VS Code by opening the command palette ("view -> Command Palette") and executing the "Developer: Reload Window" command, which also restarts the "ansible-language-server" process running in the background.
- If the extension is not working as expected, you can follow the debug steps shown here. If it is still not working, please do raise an issue here.
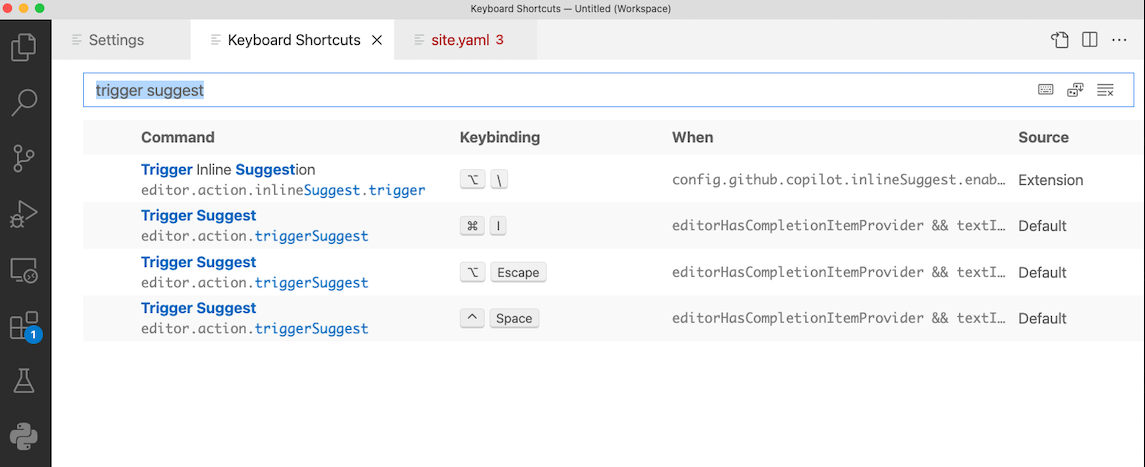
The auto-completions will now provide suggestions for plugins that are part of the given execution environment image name.

The "trigger suggest" key depends on the keyboard shortcut. To view the associated keys, go to Code -> Preferences -> Keyboard Shortcuts.
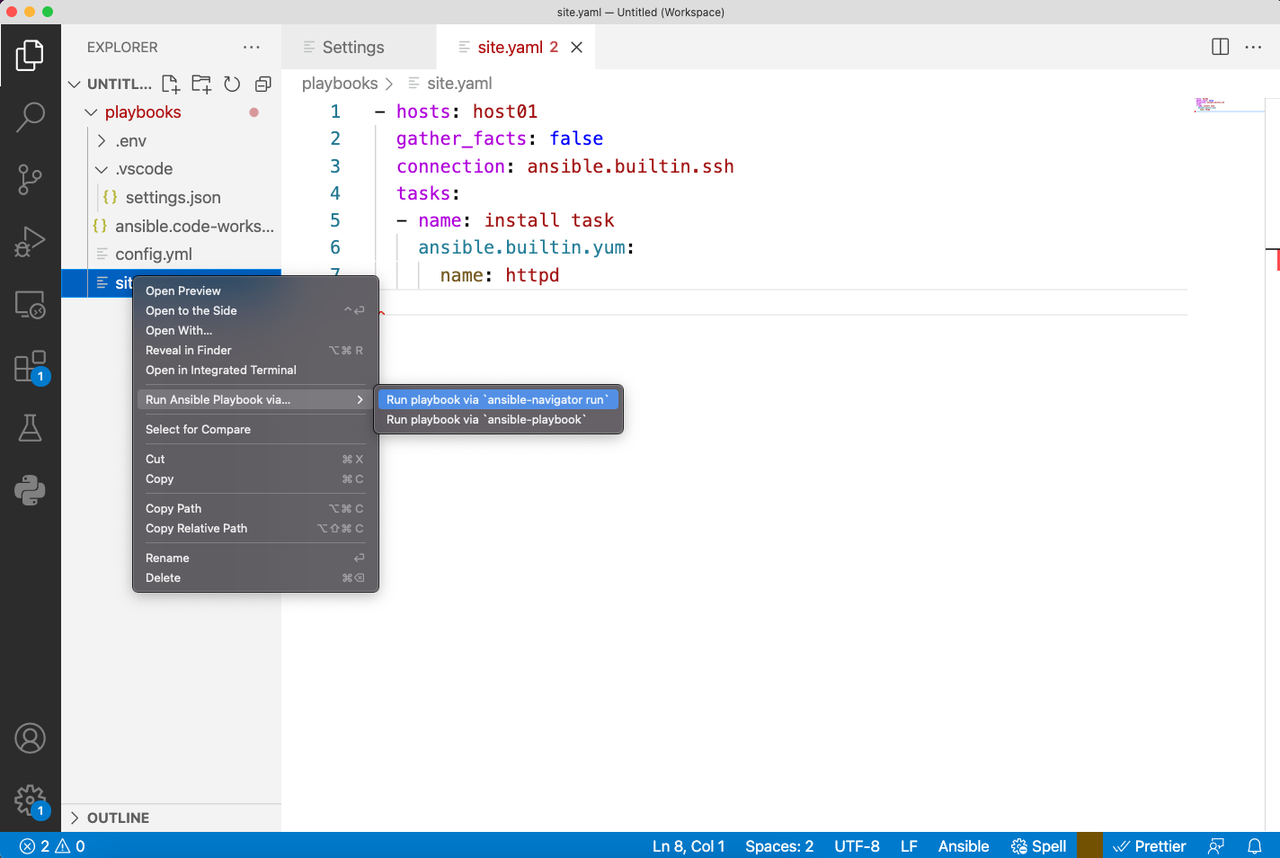
Ansible Playbook run entry point
The extension also provides an option to run an Ansible Playbook from within the extension either using "ansible-navigator run" or "ansible-playbook" command as shown in the below snapshot.