Ansible Linting with GitHub Actions

Ansible Linting with GitHub Actions

Want to trigger linting to your Ansible deployment on every Pull Request?

In this blog, I will show you how to add some great automation into your Ansible code pipeline. 

CI/CD is currently a pretty hot topic for developers. Operations teams can get started with some automated linting with GitHub actions. If you use GitHub you can lint your playbooks during different stages including git pushes or pull requests.

If you're following good git flow practices and have an approval committee reviewing pull requests, this type of automated testing can save you a lot of time and keep your Ansible code nice and clean.

What is Ansible Lint?

Ansible Lint is an open source project that lints your Ansible code. The docs state that it checks playbooks for practices and behavior that could potentially be improved. It can be installed with pip and run manually on playbooks or set up in a pre-commit hook and run when you attempt a commit on your repo from the CLI.

The project can be found under the Ansible org on GitHub.

What are GitHub Actions?

From the GitHub documentation: GitHub actions enable you to create custom workflows to automate your project's software development life cycle processes. A workflow is a configurable automated process made up of one or more jobs. You must create a YAML file to define your workflow configuration. You can configure your workflows to run when specific activity on GitHub happens, at a scheduled time, or when an event outside of GitHub occurs.

An Ansible Lint action can be found on GitHub's Actions Marketplace.

Example repo

Let me show you an example of what this would look like. Here I have a repo that has an Ansible Playbook.

https://github.com/colin-mccarthy/ansible_lint_demo

I attempted to submit a pull request to add a new playbook. The Ansible Lint Action kicked off and eventually detected an issue and returned a failed message.

Why did it fail?

I'm able to view the build logs under the Actions section of my repo. It looks like I had some trailing white space and was comparing to an empty string on one of my tasks.

image one

Will I get an email notification?

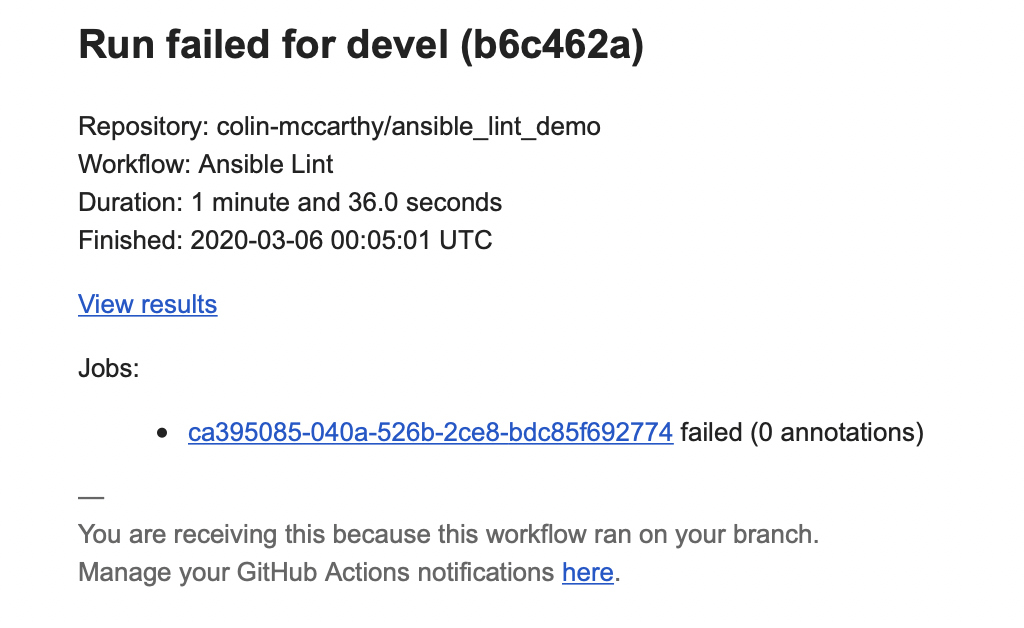
I received an email notification as well, letting me know it had failed.

image two

Setting it up

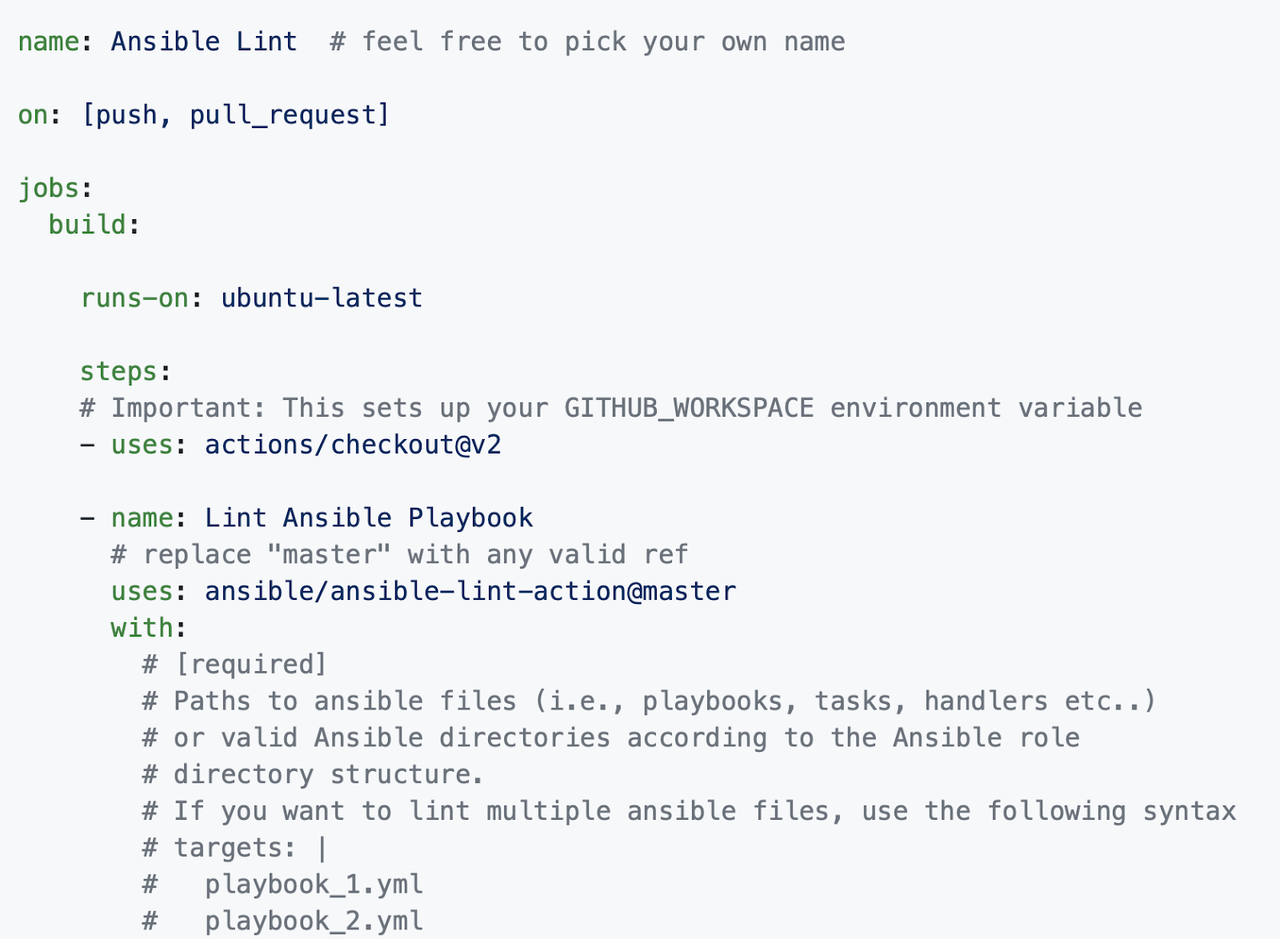
To use the action simply create an Ansible Lint.yml (or choose custom *.yml name) in the .github/workflows/ directory.

image three

So here is the really cool part, you can run the action on various events! This means every time someone submits a PR, or does a push, the action will be triggered and a container will spin up and run Ansible lint on your repo. You can define what events will trigger the action using the on: parameter.

on: [push, pull_request]

Pre-commit hooks

I would like to go a little deeper into linting by bringing up pre-commit hooks.

Pre-commit hooks are little scripts run locally on your machine that can help identify issues before submission for code review. When talking about the Ansible Lint action, it would really come in handy to lint the code before you submit your pull request. This would make sure you always pass. The GitHub action would just serve as the final step that guards the shared repo. If you are using pre-commit hooks you should hypothetically never fail the GitHub action test.

Example:

image four

https://pre-commit.com

To set this up on my MacBook I simply did a pip install.

pip install pre-commit

To set it up on your repo just make sure you...​

pre-commit install

To use Ansible Lint with pre-commit, just add the following to your local repo's .pre-commit-config.yaml file. Make sure to change rev: to be either a git commit sha or tag of Ansible Lint containing hooks.yaml.

image five

Markdown badge

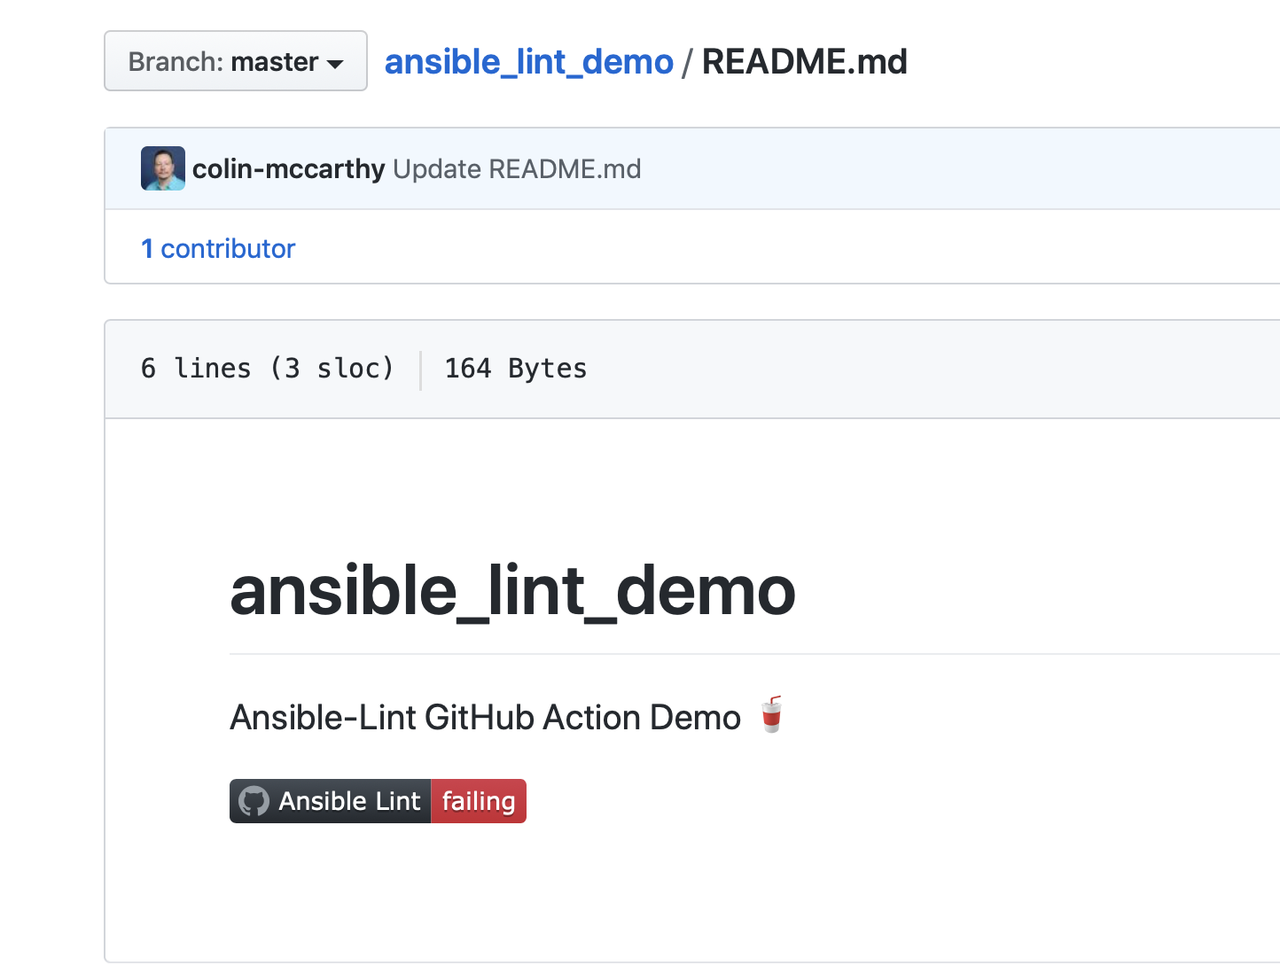
Once you set up your action, Github will give you a snippet of markdown code you can add to the README.md displaying the linting status of your repo. A badge for your repo to show if it is passing the linting test.

image six

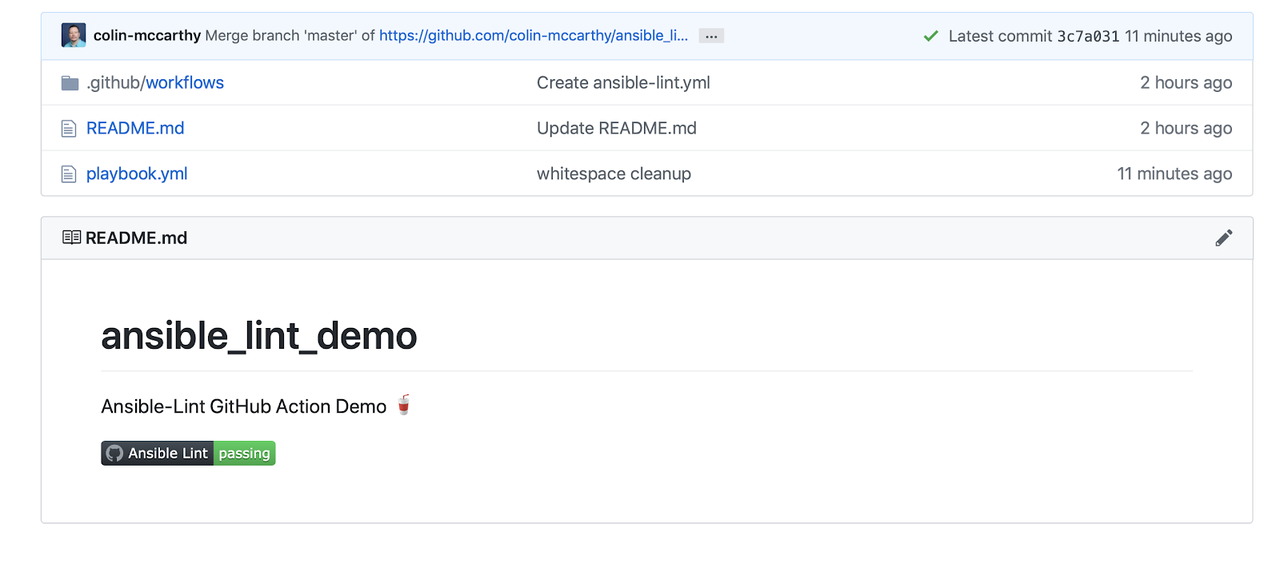
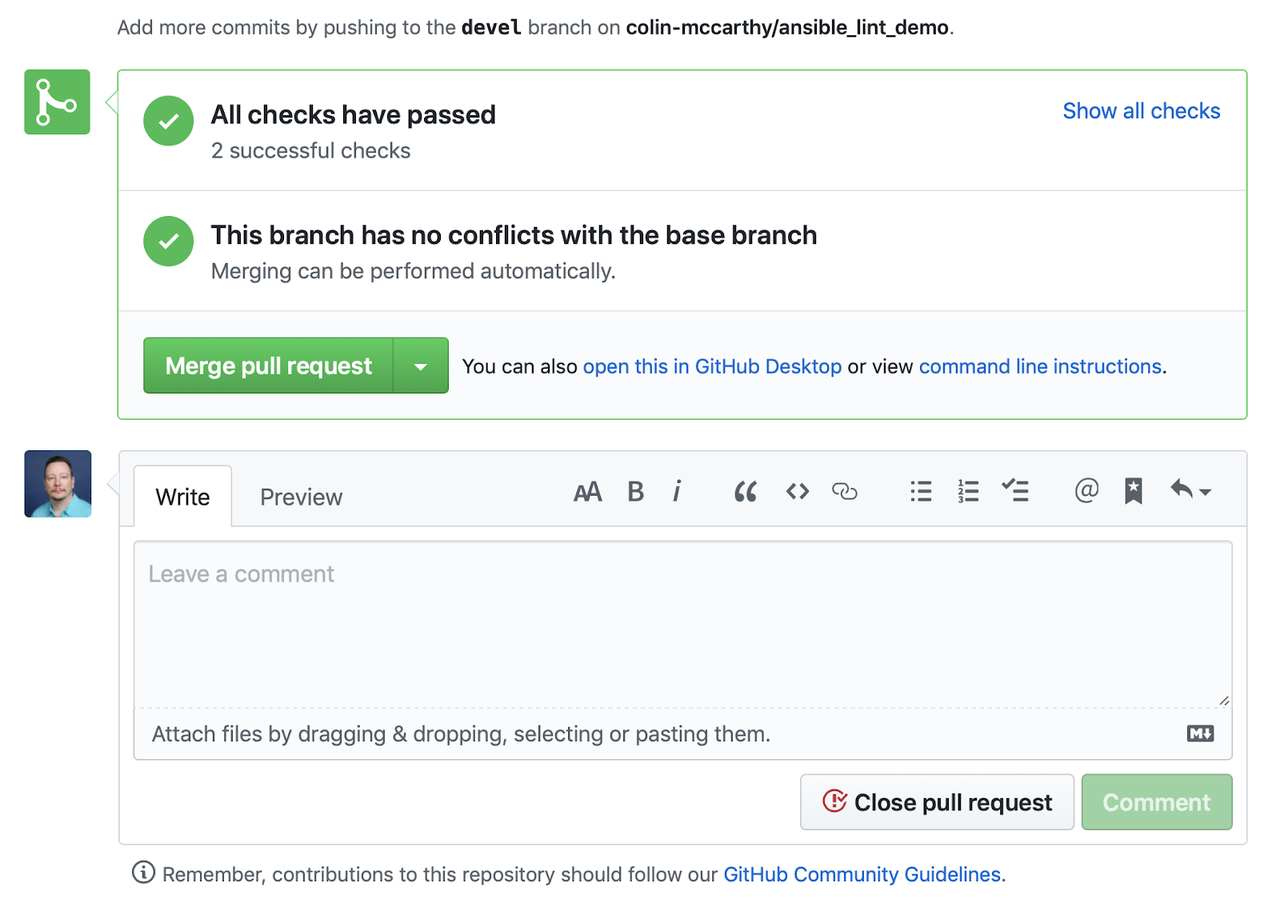
After removing the trailing whitespace and fixing all issues my PR is showing "All checks have passed" and my badge is showing passed.

image seven

image eight

In conclusion

Enforcing linting on code changes can build trust that your code is following best practices. Hopefully, you can try and add some linting to your Ansible repos with GitHub Actions or pre-commit hooks. Setting up this action was a lot of fun and I especially like the badge that was provided.


Bullhorn #1

Ansible Bullhorn banner

The Bullhorn

A Newsletter for the Ansible Developer Community

Welcome to The Bullhorn, our newsletter for the Ansible developer community. There are a lot of changes happening in Ansible right now, so we thought this would be a good time to start a newsletter to help everyone stay up-to-date.

For now, we’ll probably release a new issue every couple of weeks or so. If you have any particular topics you’d like to see discussed in this newsletter, please reach out to us at gdk@redhat.com.


AN UPDATE ON ANSIBLE 2.10

If you’ve been following the development of Ansible 2.10, you know that we’re splitting out much of the code from the ansible/ansible repository on GitHub into new collections. We discussed the rationale for this change in a couple of blog posts in July of 2019 [1] [2].

For end users, nothing much should change. Ansible 2.10 will contain all of the modules and plug-ins that were present in Ansible 2.9, and playbooks written for Ansible 2.9 should generally work in Ansible 2.10. Users who “pip install ansible” should get the same experience. We expect to have a long beta cycle to help ensure compatibility between 2.9 and 2.10.

Under the hood, though, there’s quite a bit going on for developers to be aware of: 
  • Content migration. In March, the Ansible Core development team froze the development tree for ansible/ansible and migrated most of the modules into one of the following repositories:

    • The community.general collection, which will be the new home for most community-written and community-supported content shipped in Ansible, built from a single community.general repository [3], and which will follow largely the same development process as Ansible has followed previously;

    • A set of more specific community collections, including: 

      • The community.networking collection [4], which provides a broad array of community-written and community-supported networking modules;

      • The community.crypto collection [5], a collection of related crypto modules with an active working group;

      • The community.grafana collection [6], a collection of modules to manage Grafana;

      • And various other collections that are managed by members of the Ansible community;

    • Partner collections, which are written, maintained, and supported by Ansible partners, a current list of which can be found here [7].

  • The new ansible-base project. Some modules remain in the ansible/ansible repository, which is now the home of the ansible-base project. Ansible-base is the core engine of Ansible itself, plus a small subset of key modules and libraries that are maintained by Red Hat. The ansible-base project is at the heart of everything Ansible does, and the Ansible team at Red Hat will keep a strong focus on maintaining it at a high level of quality and stability. As well as being packaged with Ansible, Ansible-base will now also release separately from Ansible, and will also ship with the Red Hat Ansible Automation Platform. Our current target date for release of ansible-base 2.10 is the end of July 2020. Follow our progress towards the release of ansible-base 2.10 here [8].

  • Ansible 2.10 build tooling. Because Ansible 2.10 will be composed from separate collections, we are working on build tools that will assemble those collections into a single pip deliverable. Initial versions of that build code can be found here [9], and we expect to be putting together our first alpha builds of Ansible 2.10 in the coming days. Look for an announcement here on The Bullhorn, on the Ansible developer mailing list, and elsewhere. 

  • GitHub redirection work. Now that much of the Ansible source code has moved, it might not always be clear to potential contributors where to submit issues or PRs. We will be working on workflow tools to direct contributors to the new content locations. We will also be working on tooling to make it easy for contributors to re-file existing PRs or issues in the new repositories. Follow the status of our GitHub redirection work here [10].

We’re still quite early in this process, but we’ve made a lot of progress. Assuming things continue to go well, we should be on track for a release of Ansible 2.10 by AnsibleFest in October 2020, or perhaps earlier.

Follow our progress towards the release of Ansible 2.10 here [11] and here [12].
 

ANSIBLE CONTRIBUTOR SUMMIT 

On March 29th, we held our first fully virtual Ansible Contributor Summit. The event was originally scheduled to be an in-person event co-located with FOSS North in Gothenburg, Sweden, but COVID-19 changed our plans.  

Despite our inability to meet in person, the Contributor Summit was a productive and successful event, with almost 50 contributors joining us over the course of the day. You can check out the videos [13] of the livestream event, along with a detailed summary [14] and a full log [15] of the accompanying IRC session. 

On March 30th, we followed the contributor summit with a virtual hackathon, in which we followed up on many of the issues that were discussed. Both a summary [16] and a full log [17] are available for the hackathon as well. 

In the future, we expect to have these virtual contributor summit events roughly once a quarter, which means the next event should happen near the end of June 2020. We will rotate the start times of these sessions to make them more accessible to people spread across the globe. 
 

COMMUNITY METRIC HIGHLIGHT: COLLECTIONS GROWTH 

As the Ansible community continues to grow, we rely increasingly on metrics to keep track of our progress towards our goals.  

One of our key areas of focus is on contributors to collections. As we make the shift to collections, we want to ensure that our contributors are successful in making the switch. We’ve got a dashboard that shows us the progress of each collection in regaining its momentum from its original development in ansible/ansible. Here’s a small sample of that dashboard: 

You can see the full dashboard here [18]. 


FEEDBACK 

Have any questions you’d like to ask, or issues you’d like to see covered? Please send us an email to gdk@redhat.com.

If you know somebody who could benefit from reading this newsletter, please feel free to forward it to them.


Getting started with Ansible and Check Point

Getting started with Ansible and Check Point

The scale and complexity of modern infrastructures require not only that you be able to define a security policy for your systems, but also be able to apply that security policy programmatically or make changes as a response to external events.  As such, the proper automation tooling is a necessary building block to allow you to apply the appropriate actions in a fast, simple and consistent manner.

Check Point has a certified Ansible Content Collection of modules to help enable organizations to automate their response and remediation practices, and to embrace the DevOps model to accelerate application deployment with operational efficiency. The modules, based on Check Point security management APIs are also available on Ansible Galaxy, in the upstream version of Check Point Collection for the Management Server

The operational flow is exactly the same for the API as it is for the Check Point security management GUI SmartConsole, i.e. Login > Get Session > Do changes > Publish > Logout. 

Security professionals can leverage these modules to automate various tasks for the identification, search, and response to security events.  Additionally, in combination with other modules that are part of Ansible security automation, existing Check Point infrastructures can be integrated in orchestrated processes involving multiple security technologies.  

DevOps professionals can consume the same modules in automated workflows to support the deployment and maintenance of both physical and virtualized next-generation firewalls.

To better understand how these new modules can be consumed, I'll provide a series of examples based on the code in the security automation community project, under the Ansible security automation Sample Plays GH repo.  The pre-requisite for the integrations to work and function as expected is that Check Point R80 versions are supported by this integration given this hotfix is applied.

Ansible Check Point Modules

cp_mgmt_* modules have been released with Ansible 2.9. They can be currently found in the 'latest' branch of the documentation.

There are quite a few modules available to manage the Check Point appliance, in the Check Point Mgmt Collection they are structured in two categories:

  • cp_mgmt_*: All these modules use the aforementioned API to post API objects on the Check Point appliance.
  • cp_mgmt_*_facts: All the facts modules use the same API to get facts from the Check Point appliance.

As an example, if we look at the modules dedicated to host objects this is reflected in the following way:

  • cp_mgmt_host - Manages host objects on Check Point devices including creating, updating and removing objects.
  • cp_mgmt_host_facts - Gets host objects facts on Check Point devices.

There are also a total of nine checkpoint_* modules which were introduced with Ansible 2.8, but these modules are deprecated and it's encouraged and advisable to use the latest cp_mgmt_* modules that were introduced in Ansible 2.9 unless required.

cp_mgmt_* modules example: How to perform host configuration

Here is an example of how to use the  cp_mgmt_host module to configure a host:

---
- hosts: check_point
  connection: httpapi
  tasks:
    - name: Create host object
      cp_mgmt_host:
        color: dark green
        ipv4_address: 192.0.2.2
        name: New CP_MGMT Host 1
        state: present
        auto_publish_session: true

When the module argument auto_publish_session is set to True, you will  make Ansible run to take effect on your Check Point appliance immediately.  You'll then have to publish the changes, and that's what auto_publish_session achieves.  Note that by default, the value of auto_publish_session is False. This module argument is available if the user wants to publish the changes at task level.

However, if we want to publish the changes at the very end of the play run, after running "n" number of tasks, we can just run the available cp_mgmt_publish module at the end of the play, and all changes done will take effect on your Check Point appliance.

To run the playbook use the ansible-playbook command:

Checkpoint blog one

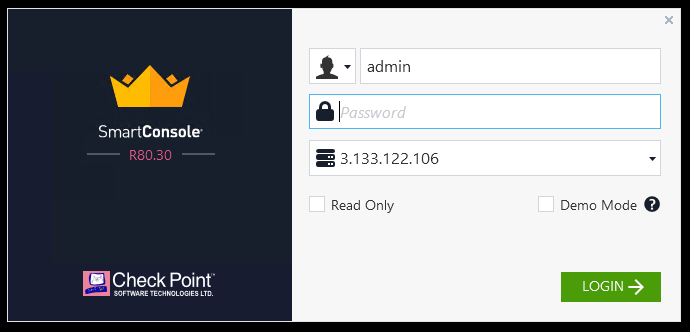
To check if this has effectively changed the Check Point configuration as expected, login to the Check Point SmartConsole and look under Network objects -> Hosts where we will see the new host listed:

checkpoint blog two

The modules can keep state (where applicable) so when we re-run the playbook instead of \"changed\" it will just say OK without performing any changes to the Check Point appliance. This is also referred to as idempotency (also see the Ansible Docs).

checkpoint blog three

Example: How to collect hosts facts

Check Point facts modules allow us to query different Check Point objects, such as network, address, dns domain, host records, and more.

Let's look at an Ansible Playbook snippet focused on grabbing information about an host configured via the previous example playbook:

---
- hosts: check_point
  connection: httpapi
  tasks:
    - name: collect-host facts
      cp_mgmt_host_facts:
        name: New CP_MGMT Host 1
      register: cp_host
    - name: display host facts
      debug:
        msg: "{{ cp_host }}"

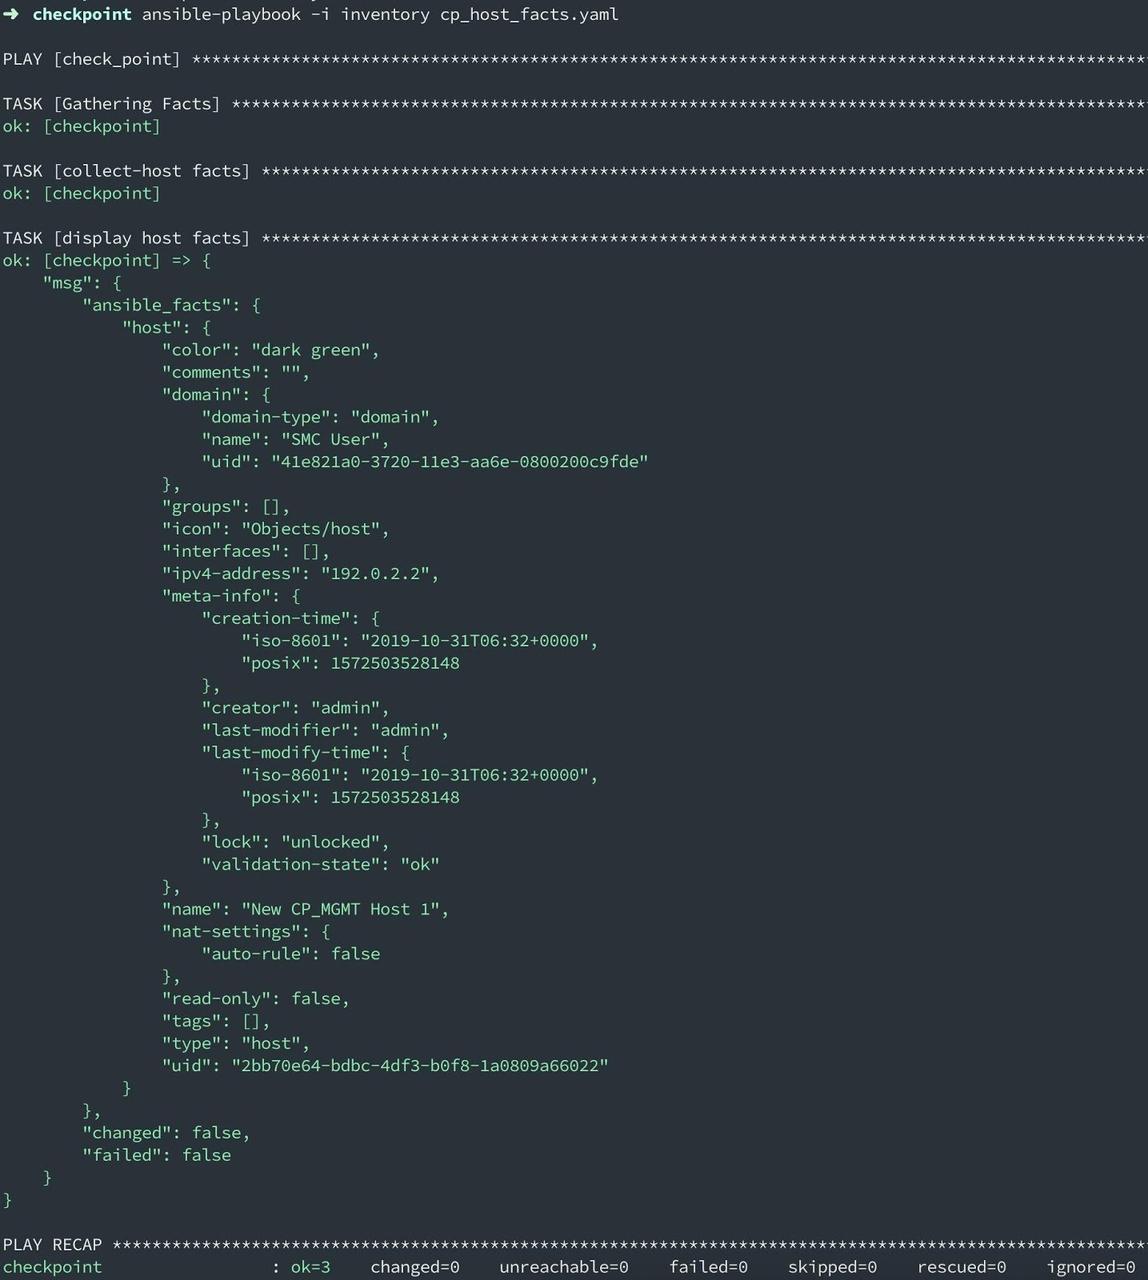
Run the playbook with the ansible-playbook command as:

checkpoint blog four

Play output: All of the host facts related to queried host name i.e. "New CP_MGMT Host 1"

The above playbook shows how we can query Check Point to collect specific information about objects (in this case, hosts). These facts can be then used through an Ansible play and allow an appliance, or a group of appliances, to act as a single source of truth for information that may be changing. To read more about Ansible variables, facts and the set_fact module, refer to the Ansible variables documentation.

How to use Check Point modules in response and remediation scenarios

Ansible security automation supports interoperability between the many security technologies used by SOCs or security teams as part of their response and remediation activities. 

To help security professionals adopt Ansible as the common automation language for security, we have written a number of roles that can be immediately consumed to accelerate productivity in these scenarios.

An example of these roles is acl_manager, which can be used to automate tasks such as blocking and unblocking IP and URLs on supported technologies, like Check Point NGFW. 

How to Block an IP in Check Point using the acl_manager role

---
- hosts: checkpoint
  connection: httpapi
  tasks: 
   - include_role:
       name: acl_manager
       tasks_from: blacklist_ip
     vars:
       source_ip: 192.0.2.2
       destination_ip: 192.0.2.12
       ansible_network_os: checkpoint

Roles can be used to abstract common security tasks to seamlessly support specific use cases without getting into underlying module functionalities.

The Check Point management API and other Check Point APIs are defined in the Check Point API Reference.


Migrating existing content into a dedicated Ansible collection

Migrating existing content into a dedicated Ansible collection

Today, we will demonstrate how to migrate part of the existing Ansible content (modules and plugins) into a dedicated Ansible Collection. We will be using modules for managing DigitalOcean's resources as an example so you can follow along and test your development setup. But first, let us get the big question out of the way: Why would we want to do that? 

Ansible on a Diet

In late March 2020, Ansible's main development branch lost almost all of its modules and plugins. Where did they go? Many of them moved to the ansible-collections GitHub organization. More specifically, the vast majority landed in the community.general GitHub repository that serves as their temporary home (refer to the Community overview README for more information). 

The ultimate goal is to get as much content in the community.general Ansible Collection "adopted" by a caring team of developers and moved into a dedicated upstream location, with a dedicated Galaxy namespace. Maintainers of the newly migrated Ansible Collection can then set up the development and release processes as they see fit, (almost) free from the requirements of the comunity.general collection. For more information about the future of Ansible content delivery, please refer to an official blog post, a Steampunk perspective, as well as an AnsibleFest talk about Ansible Collections. 

Without any further ado, let us get our hands dirty by creating a brand new DigitalOcean Ansible Collection.

The Migration Process

There are three main reasons why we selected DigitalOcean-related content for migration:

  1. It contains just enough material that it is not entirely trivial to migrate (we will need to use some homemade tools during the migration process).
  2. DigitalOcean modules use standard features like documentation fragments and utility Python packages, which means that merely copying the modules over will not be enough.
  3. It is currently part of the community.general Ansible Collection.

Edit (2020-09-23): The DigitalOcean modules were moved to the community.digitalocean collection in July 2020, so the last point from the list above does not hold anymore. But I guess the move confirmed that our selection of an example was correct

So it should not come as a surprise that content migration is a multi-step process. We need to create a working directory, clone the community.general Ansible Collection into it, and create an empty destination collection. But before we can do any of that, we must decide on the name of this new Ansible Collection.

It is a well known fact that there are only two hard things in Computer Science: cache invalidation, naming things, and off-by-one errors ;) Fortunately, in our case, finding a proper name is relatively simple: because we are moving all modules for working with DigitalOcean's cloud platform, we will name it digital_ocean.digital_ocean.

$ mkdir -p ~/work/ansible_collections
$ cd ~/work/ansible_collections
$ mkdir community
$ git clone --depth 1 --branch 0.2.0 \
    https://github.com/ansible-collections/community.general.git \
    community/general
$ ansible-galaxy collection init digital_ocean.digital_ocean
$ cd digital_ocean/digital_ocean

With the directories in place, we can start copying the content over into our new Ansible Collection. But instead of just moving the modules over, we will also take the opportunity to rename the modules. 

DigitalOcean-related module names all have the digital_ocean_ prefix because up until Ansible 2.8, all modules lived in the same global namespace. Now that we are moving them into a separate namespace, we can safely drop that prefix. We could do that manually, but writing a few lines of Bash will be faster and more intellectually satisfying: 

$ source=../../community/general
$ mkdir -p plugins/modules
$ for m in $(find $source/plugins/modules/ -name 'digital_ocean_*.py' -type f)
> do
>   new_name=$(basename $m | sed 's/digital_ocean_//')
>   echo "  Copying $(basename $m) -> $new_name"
>   cp $m plugins/modules/$new_name
> done

Next, we need to copy over utility Python files that our modules use. We can get a list of all such modules by searching for the module_utils imports:

$ grep -h "ansible_collections.community.general.plugins.module_utils." \
    plugins/modules/*.py | sort | uniq

We need to move a single Python file over and then fix the import statements, which is easy enough to automate:

$ mkdir plugins/module_utils
$ cp ../../community/general/plugins/module_utils/digital_ocean.py \
    plugins/module_utils/
$ sed -i -e 's/ansible_collections.community.general.plugins/./' \
    plugins/modules/*.py

The last thing that we need to fix is the documentation. Because we renamed the modules during the move, we need to drop the digital_ocean_ prefix from the module: digital_ocean_${module_name} part of the DOCUMENTATION block. We also need to adjust the EXAMPLES section and replace the old module names with fully qualified ones. sed time again:

$ sed -i -r \
    -e 's/module: +digital_ocean_([^ ]+)/module: 1/' \
    -e 's/digital_ocean_([^ ]+):/digital_ocean.digital_ocean.1:/' \
    plugins/modules/*.py

We also need to copy over any documentation fragments that our modules use. We can identify them by searching for the community.general. string in our modules: 

$ grep -h -- "- community.general." plugins/modules/*.py | sort | uniq

Now, we must repeat the steps we did with the utility files: copy the documentation fragment files over and update the references. Again, because our fragment now lives in its own dedicated namespace, we can rename it into something more meaningful. Since our documentation fragment contains definitions of common parameters, we will call it common. And we promise that this is the last fix that we do using sed and regular expressions. ;)

$ mkdir plugins/doc_fragments
$ cp ../../community/general/plugins/doc_fragments/digital_ocean.py \
    plugins/doc_fragments/common.py
$ sed -i -e 's/community.general.digital_ocean.documentation/digital_ocean.digital_ocean.common/' \
    plugins/modules/*.py

And we are done. Time to pat ourselves on the back and commit the work:

$ git init && git add . && git commit -m "Initial commit"

If you are only interested in the final result of this migration, you can download it from the digital_ocean.digital_ocean GitHub repo. 

Taking Our New Collection for a Ride

If we want to test our newly created DigitalOcean Ansible Collection, we need to tell Ansible where it should search for it. We can do that by settings the ANSIBLE_COLLECTIONS_PATHS environment variable to point to our work directory. How will we know if things work? We will kindly ask Ansible to print the module documentation for us. 

$ export ANSIBLE_COLLECTIONS_PATHS=~/work
$ ansible-doc digital_ocean.digital_ocean.domain

If all went according to plans, the last command brought up the documentation for the domain module. Note that we used the domain module's fully-qualified collection name (FQCN) in the last command. If we leave out the namespace and collection name parts, Ansible will not be able to find our module.

And as the ultimate test, we can also run a simple playbook like this one:

---
- name: DigitalOcean test playbook
  hosts: localhost
  gather_facts: false

  tasks:
    - name: Create a new droplet
      digital_ocean.digital_ocean.droplet:
        name: mydroplet
        oauth_token: OAUTH_TOKEN
        size: 2gb
        region: sfo1
        image: centos-8-x64
        wait_timeout: 500

When we execute the ansible-playbook play.yaml command, Ansible will yell at us because we provided an invalid authentication token. But we should not be sad because the error message proves that our module is working as expected. 

Where to Go from Here

In today's post, we demonstrated what the initial steps of content migration are. But the list does not end here. If we were serious about maintaining Ansible Collections such as this, we would need to add tests for our modules and set up the CI/CD integration. 

Another thing that we left out of this post is how to push the newly created Ansible Collection to Ansible Galaxy. We did this not because publishing a collection is particularly hard, but because it is almost too easy. All one has to do is get hold of the digital_ocean namespace and then run the next two commands:

$ ansible-galaxy collection build
$ ansible-galaxy collection publish \
    --api-key {galaxy API key here} \
    digital_ocean-digital_ocean-1.0.0.tar.gz

Publishing a collection that we do not intend to maintain would be a disservice to the Ansible community. Quality over quantity.

If you need help with migrating existing content into a dedicated Ansible Collection and maintaining it on the long run, contact our experts and they will gladly help you out.

Cheers! 


Hands on with Ansible collections

Hands on with Ansible collections

Ansible collections have been introduced previously through two of our blogs "Getting Started with Ansible Content Collections" and "The Future of Ansible Content Delivery". In essence, Ansible Automation content is going to be delivered using the collection packaging mechanism.  Ansible Content refers to Ansible Playbooks, modules, module utilities and plugins. Basically all the Ansible tools that users use to create their Ansible Automation. Content is divided between two repositories:

  1. Ansible Galaxy (https://galaxy.ansible.com)
  2. Automation Hub (https://cloud.redhat.com/ansible/automation-hub)

Ansible Galaxy is the upstream community for sharing Ansible Collections.  Any community user can create a namespace and share content with anyone. Access to Automation Hub is included with a Red Hat Ansible Automation Platform subscription.  Automation Hub only contains fully supported and certified content from Red Hat and our partners. This makes it easier for Red Hat customers to determine which content is the official certified, and importantly supported, content.  This includes full content from partners such as Arista, Cisco, Checkpoint, F5, IBM, Microsoft and NetApp. 

In this blog post we\'ll walk through a use case wherein, the user would like to use a Red Hat certified collection from Automation Hub and also use a community supported collection from Ansible Galaxy.

There are different ways to interact with Ansible Collections and your Ansible Automation:

  1. Install into your runtime environment or virtual env
  2. Provide as part of your SCM tree
  3. Using a requirements file

Regardless of the method chosen, first you need to find, identity and obtain the Ansible Collections you want to use.

Ansible Playbook repo structure:

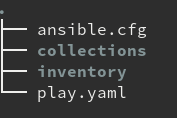
Here is my setup for this demonstration of Ansible Collections:

Ajay blog one

  • ansible.cfg is the Ansible configuration file.  I will elaborate on this in the next section.
  • collections is a directory storing all Ansible Collections that my Ansible Playbook will use
  • inventory is a directory containing a inventory file named hosts
  • play.yaml is my Ansible Playbook

For my example this is a development environment where I just want to download the latest and greatest.  I will use a gitignore file to ignore the downloaded content and only track the requirements file.

Ajay blog two

This gitignore file helps ensure that your playbook repository content in the version control system only tracks your playbook and related files.  If you want to track Ansible Collections being used in your SCM just remove the Git ignore (e.g. the 2- Provide as part of your SCM tree in the introduction).  For a more in-depth look into using collections and the folder structure please refer to the documentation.

Configuring access to Automation Hub and Galaxy

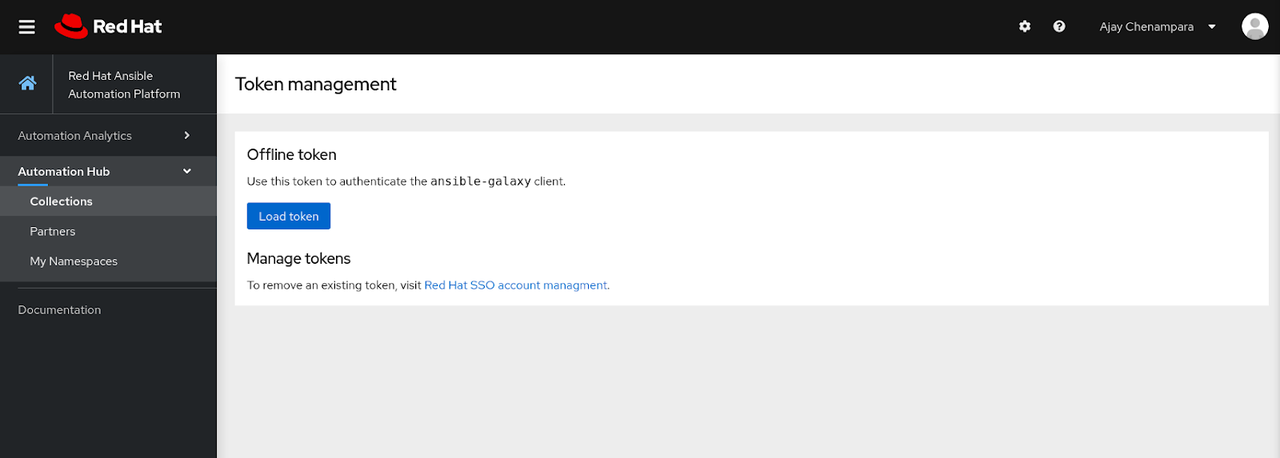
For accessing certified content from the Automation Hub, you will need to first get the token for authentication. Do this by logging into https://cloud.redhat.com and then navigating to https://cloud.redhat.com/ansible/automation-hub/token 

Ajay blog three

Clicking on the Load token button will reveal your authentication token. Save this information somewhere, we will need to enter this into the ansible.cfg file. Ansible Galaxy also has an API token used for authentication and can be accessed by navigating to https://galaxy.ansible.com/me/preferences after logging in.

Ajay blog five

Click on the Show API key button to reveal your API key.

Configuring your Ansible.cfg

We define the Galaxy servers under the [galaxy] section of the Ansible configuration file (i.e. *ansible.cfg). * An Ansible configuration file is an ini formatted file for configuring behavior settings.  This includes settings such as changing the return output from JSON to YAML. If you are unfamiliar with an Ansible configuration file please refer to the documentation.  As a reminder the Ansible configuration file is searched in the following order:\

  1. ansible.cfg (in the current directory)
  2. \~/.ansible.cfg (in the current home directory)
  3. /etc/ansible/ansible.cfg 

These tokens should be added now to the ansible.cfg file. An example of this is shown below.  It is recommended when using more than one Galaxy server to list them in server_list. The list should be in precedence order with your primary location choice first, in this case Automation Hub.

[defaults]
stdout_callback = yaml
inventory = inventory/hosts
collections_paths = ./collections

[galaxy]

server_list = automation_hub, release_galaxy

[galaxy_server.automation_hub]
url=https://cloud.redhat.com/api/automation-hub/
auth_url=https://sso.redhat.com/auth/realms/redhat-external/protocol/openid-connect/token
token=xxxxxxxxxxxxxxxxxxxxxxxxxxxxxxxxxxxxxxxxxxxxxxxxxxxxxxxxxxxxxxxxxxxxxxxxxxxxxxxxxxxxxxxxxxxxxxxxxxxxxxxxxxxxxxxxxxxxxxxxxxxxxxxxxxxxxxxxxxxxxxxxxxxxxxxxxxxxxxxxxxxxxxxxxxxxxxxxxxxxxxxxxxxxxxxxxxxxxxxxxxxxxxxxxxxxxxxxxxxxxxxxxxxxxxxxxxxxxxxxxxxxxxxxx

[galaxy_server.release_galaxy]
url=https://galaxy.ansible.com/
token=xxxxxxxxxxxxxxxxxxxxxx

Note the url and auth_url keys that define the Automation Hub repository and authentication endpoint. Also note that this file defines where the collections should be downloaded to via the collections_paths parameter (e.g.. ./collections).  For more information on configuration for Ansible Galaxy and Automation Hub please refer to the Galaxy User Guide.

Using a requirements file

For this example I am going to use the requirements.yml method where I can install all the collections from a single list. If you are familiar with the use of requirements.yml  file with roles, the file is very similar for collections. This is best understood through an example:

» cat collections/requirements.yml
collections:
  - name: junipernetworks.junos
    source: https://galaxy.ansible.com

  - name: f5networks.f5_modules
    source: https://cloud.redhat.com/api/automation-hub/

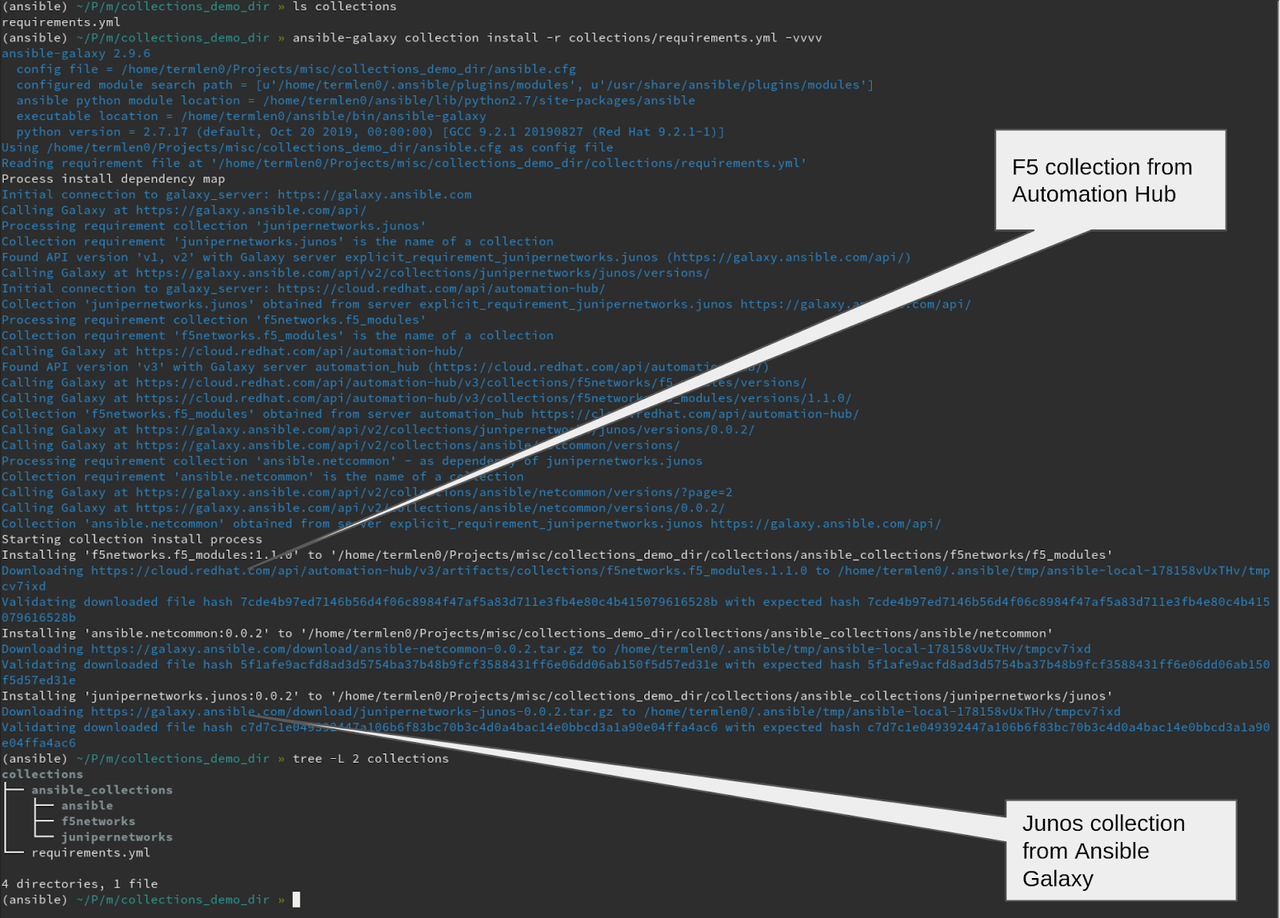
Here, we defined 2 collections that are needed for our test playbook. The Juniper Networks junos collection is being downloaded from Ansible Galaxy whereas the F5 Networks f5_modules collection is being downloaded from Automation Hub.

Installing the collections

The collections can now be installed using the command:

ansible-galaxy collection install -r collections/requirements.yml

Running this command in verbose mode helps us look at the endpoints being accessed:

Ajay Blog seven

To test the availability of modules from these new collections, you can use the ansible-doc command:

ansible-doc f5networks.f5_modules.bigip_device_info

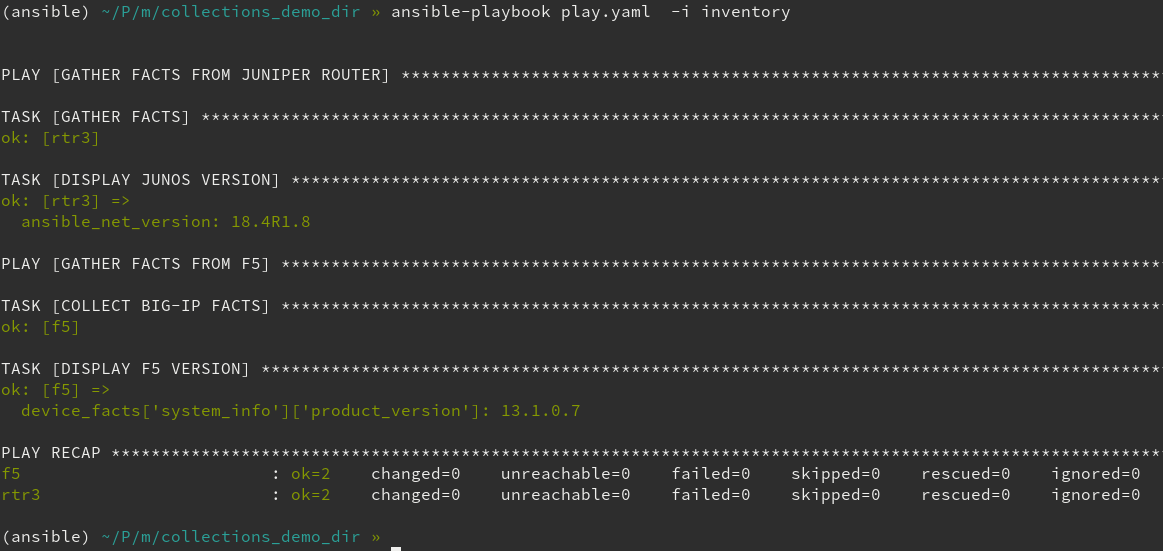
Our simple playbook will collect facts from the Juniper and F5 device (https://github.com/termlen0/collections_demo/blob/master/play.yaml). We can test the playbook by running it from the command line:

Ajay blog eight

If you don\'t want to dynamically load the latest collection content every time, comment out or remove the requirements file.  This means you can control which Ansible Collections are available by manually installing each collection required for your Ansible Playbook into the correct virtual environment.  For example to install the F5 Networks collections you would perform this command:

ansible-galaxy collection install f5networks.f5_modules

Another way would be to package the required collections in your SCM (source control management) with your other content.  This means you would sync collections in your development environment versus the Ansible Tower device.

In the future we will introduce a more standardized way around packaging collections and a particular Ansible version and its dependencies.  

Conclusion

Ansible Collections introduce a way to modularize and package automation content effectively. Red Hat Automation Hub hosts certified, secure collections that are validated and supported by Red Hat. Ansible Galaxy hosts community contributed collections. Customers can access collections from both content repositories. I think of collections as a superchargers to the "batteries included" approach that Ansible takes. It up-levels the nuances involved in building out automation, allowing users to plug-n-play the latest and greatest automation content being built by certified partners and the community.